
This is the second part of my two part blog post on using Scrivener to write a novel. I covered some useful things in part one, so if you haven’t read that yet you might want to, it has a nicer introduction.
Writing Chapters and Scenes
The first thing I build up for a novel in Scrivener is my outline. It starts small and I add to it as I write. I think it’s important to use an outline, but I also believe in not being too detailed. You run the risk of developing a mindset that you have already written the book, when all you really did was create an outline.
The actual writing part has to flow in the direction of your outline so that the story develops on course. But what stops you make along the journey is part of the magic of writing a story. So I don’t get too detailed.
I break the major events of the novel up into chapters. Each chapter is likely to have three or four scenes. There’s no law against having just one scene in a chapter. I usually break out the scenes for the next three chapters and then focus on writing them, before I move on to the next three chapters. This allows my brain time to dwell on story at hand, not where it’s going down the line.
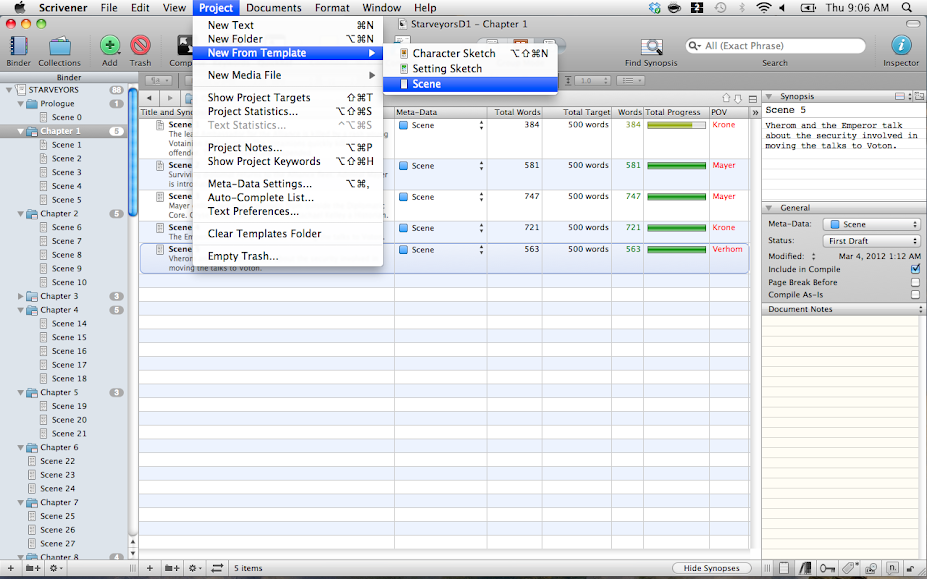
This image shows how I would add a scene from my scene template. See Part One for a decent description of exactly what a scene is as I use the word in writing a novel.
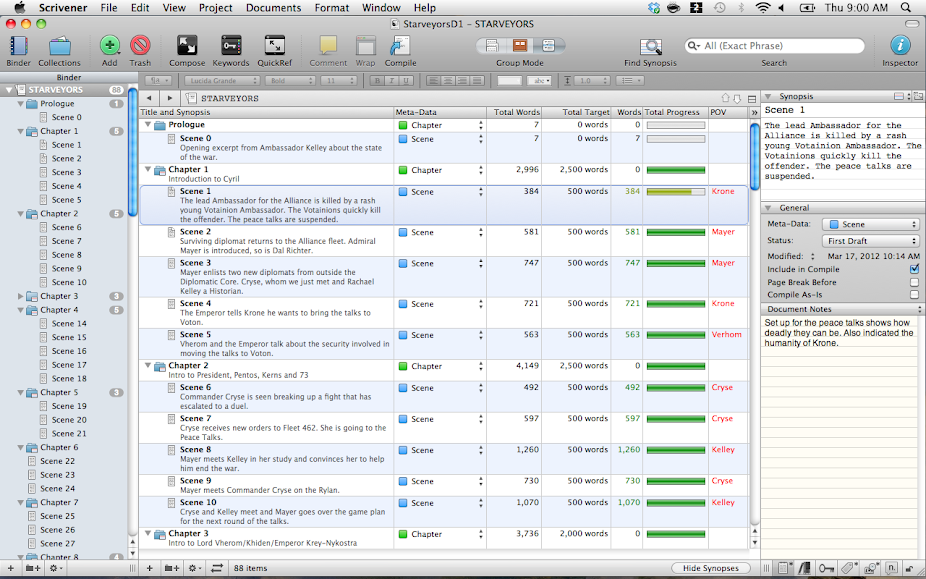
I wanted to have you take a look at this outline view for a moment so I can explain some things. The meta data that is displayed is what I use the most. So going from left to right across the outline it would be: Chapter or Scene, Total Words (actual word count), Total Target (target word count), Words (again?), Total Progress (in relation to what goal I set for the word count of that scene), and finally, Point Of View (character POV).
Each scene should be written from a single character’s point of view, so that’s important to know. General rule here is the fewer POV characters the better for a Third Person POV novel. Again, since I’m writing Space Opera, I will have more than a Mystery novel or Romance novel.
Chapter length – I strive for no more than 10 pages per chapter. It’s not a law, you can have more or less, but when you get past 20 pages, it may seem too long for a reader. Most of my Space Opera epics are paced that way with about 25-30 chapters per book. I don’t know how many scenes that is, but I believe the average scenes per chapter is 3 or 4. That’s really not very important, so I don’t track it.
Compiling Synopsis
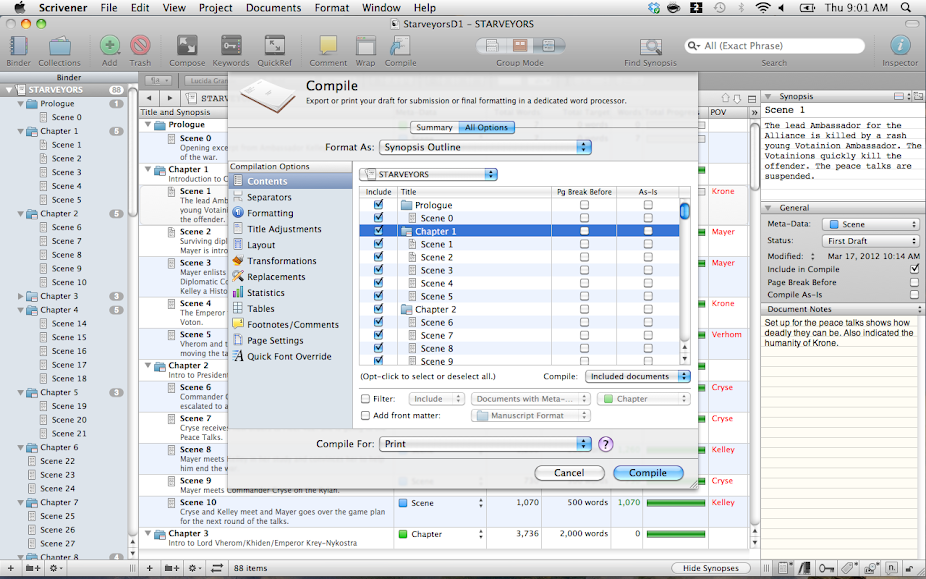
In Part One I mentioned that you could compile just your Synopsis notes. This is a very handy feature if you are submitting your novel to agents or acquiring editors. They will need to see your synopsis. Of course this only works if you actually write a chapter or scene synopsis as you create them.
If you self-publish, and don’t need it for submitting to anyone, this compile will give you a handy reference of where your story is going. So you can read it and see if your plot or sub-plots need adjusting. If nothing else, this will train you to write your synopsis as you write your novel. Because doing it after the fact, is one of Dante’s levels of hell.
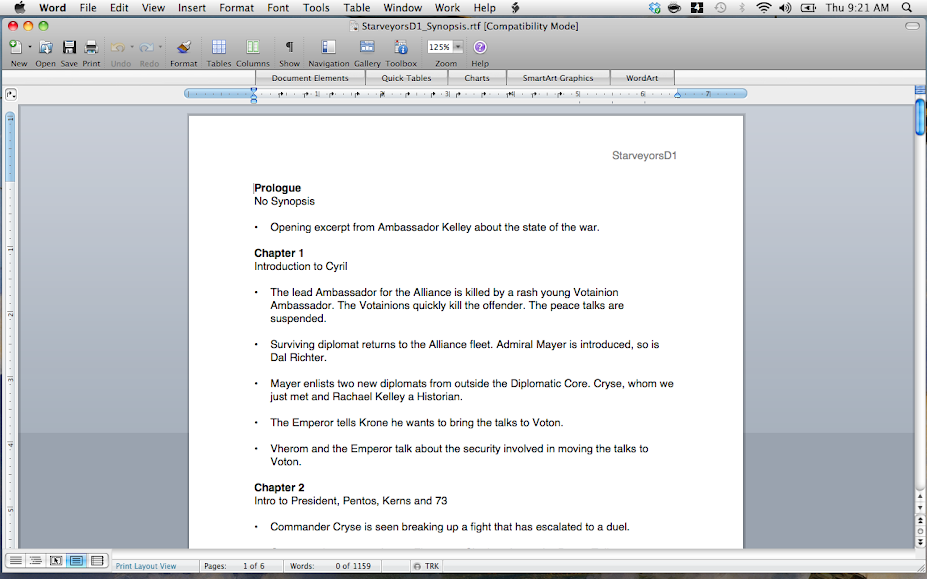
Below we see what the output of the Synopsis Outline is in Word 97 format. When you forget to write a Synopsis, it says No Synopsis. Clever. Still, this is a damn useful document for getting a handle on your novel. This one is not complete, and its already at six pages long.
Compiling a Draft
The final draft of any novel always seems to wind up in Word. This is because most digital editors prefer to make edits in Word. If you are dealing with either digital or paper submissions, then just print out the manuscript in Proof Copy format and compile for Word.
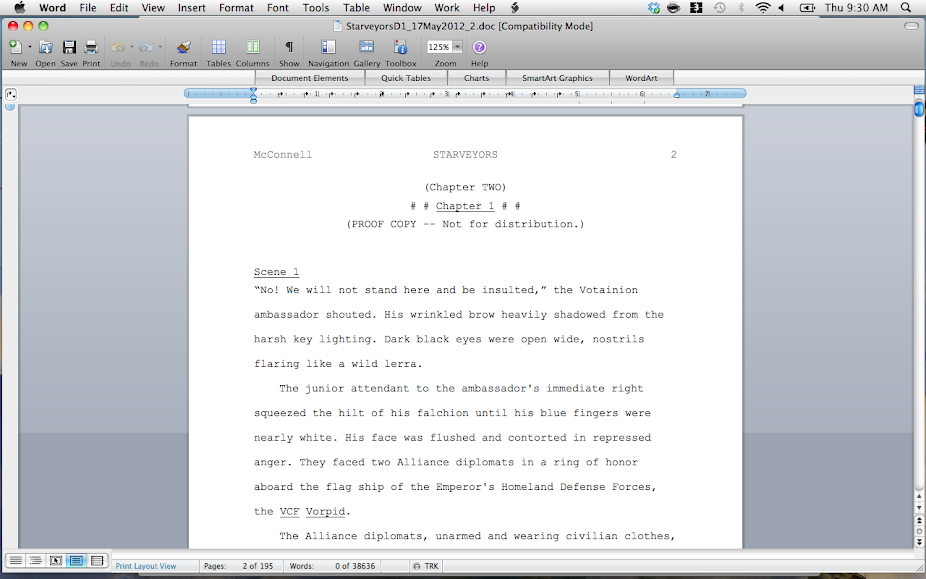
The above screen shot shows what the resulting format will look like in Word. This is what is known as Manuscript Format. Notice that italicized words are now underlined and the font was changed to look like a typewriter. It’s also double spaced and has wide margins. All of this is to make the editor’s job easier. Notice that this document is 195 pages long. Those are manuscript formatted pages. That’s the page count you are shooting for when you submit manuscripts. For this novel, I’m aiming for about 350 pages, so I’m just shy of 2/3 of the way done.
Scrivener has always had this nifty compile mode that spits out a perfectly formatted draft version of your novel. It is one of the hallmark features of the program. But it now compiles into ebook format and a whole list of other formats. I don’t use the ebook format so I can’t comment on it. My novels are edited in Word and from there are saved as RTF documents and given to my ebook designer. He has his own magical methods for transforming text into an ebook and they always look fabulous. My paper book designer also takes the final RTF version and works his magic in Adobe’s publishing software.
For my last novel, and probably for this current one, I will compile to Word and then send it to my editor. She will return it dripping in red ink and notes and I will throw it up on a larger monitor and then use a second monitor to make the changes back into Scrivener. Editing changes are the last frontier that Scrivener does not currently handle. Word is fantastic at making changes and inline notes by my editor and keeping them all assigned to a particular person. If I could wish for one feature to be added to Scrivener it would be to include the editing capabilities of Word. Then I’d never have to leave Scrivener until I compiled the final draft.
Odds and Ends
The next few things I’ll mention are parts of Scrivener that I find useful from time to time. I don’t always remember they are there, but I’m starting to use them more.
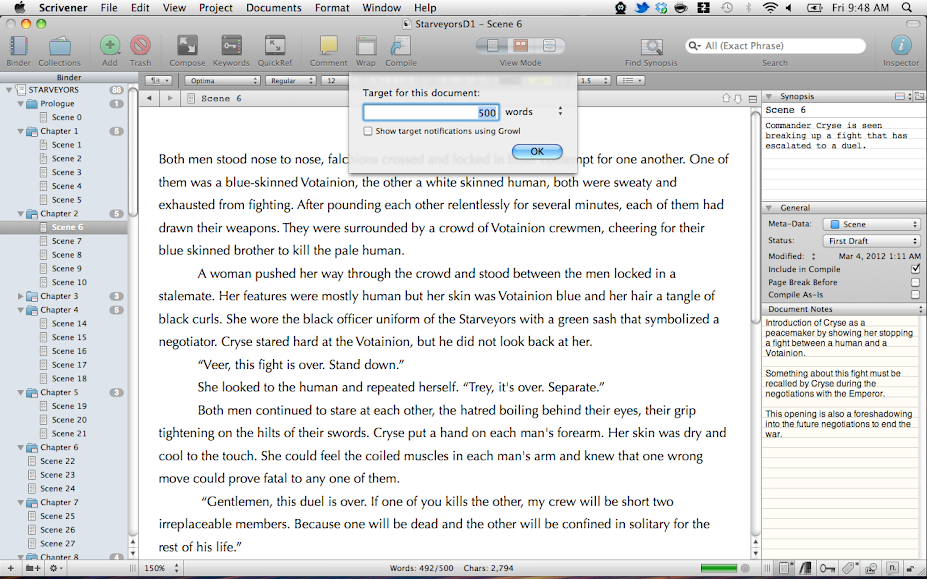
Word Target. Near the bottom right of your editor screen is a circle icon that if you click it brings up a form to fill in your estimate of how many words the scene should contain. If you set this, you’ll get a little progress bar in the same location so you know if you are getting close to your target word count. I’ve found that my scenes are either about 500 or 1000 words long on average. You can include this measurement in your outline view and that allows you to see how long your scenes are running. It does not measure pages but it can be changed to characters.
If you just want to know how many words you typed, its displayed at the bottom of the editor in real time.
I don’t use the full screen capabilities of Scrivener but they are robust and a crowd favorite. If you don’t want any visual noise while you write, go full screen and write distraction free.
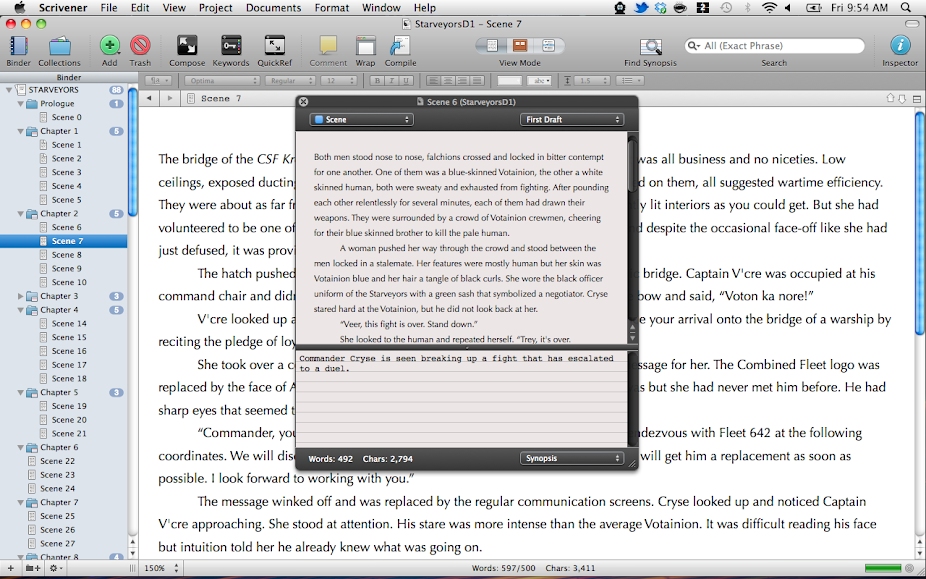
Another nifty feature for when you are deep into your novel and want to go back to a previous scene to check something, is Quick Reference. Click on the button labeled Quick Reference on the button bar. It puts up a window that you can call up a particular scene and then keep writing in the editor. This happens far more than I’d like. Especially when it comes to character thoughts or details of a location that you can’t quite recall.
That’s All Folks
There you have it. That’s all I the features I use in Scrivener when I write. I probably only use a small fraction of what’s available in this application, but that’s pretty typical for most users.
If there’s a feature in Scrivener that you think I should try, let me know in the comments. I’m always wiling to give it a go, at least once. Thanks for tuning in to this two part series.
Now get your copy of Scrivener and go write that novel!
Just about all of what you assert is supprisingly legitimate and that makes me wonder the reason why I hadn’t looked at this with this light previously. Your piece really did turn the light on for me as far as this specific topic goes. But at this time there is actually one point I am not too comfortable with and whilst I try to reconcile that with the actual main idea of the position, permit me see exactly what the rest of the readers have to say.Well done.
No thanks, Patrick. I already have a family. Also, I don’t use Scrivener anymore. I’m all in on Ubuntu and Plume Creator.
If I promise to have your children will you please post the Scrivener Template you used for this article?
Great articles on Scrivener, Ken. I am trying to push the envelope how Scrivener is used by applying it to write the Standard Operating Guidelines for a fire department. The document is currently 90 or so sections in Word, totaling 350 pages single spaced. However, the SOG’s are really 90 relatively un-related documents. The only real connection between them is the occasional cross reference.
It is not as exciting a use as writing fiction, but the revision control and ability to move things around easily seems like it will be a good fit. The ability to concentrate on one document at a time is a big deal. I need to figure things out like standardized styles for the 90 document so it looks like one unified document when compiled.
Have Fun,
Jeff
Enzo – Unfortunately, I don’t have a pdf of these posts, but I’m glad you like them.
Great post. I´m fan os scrivener.
I would like to download your post in a pdf format, have you one?
I recently started using Scrivener. I want to thank you for writing these two articles. They have helped me immensely especially the screen shots. I’m a blogger as well and know how laborious it is to write an information packed post.
So thank you for the free help!
Pingback: How I Use Scrivener to Write a Novel Part Two | Everything Scrivener
Simon – Thanks for reading the posts, glad you enjoyed them. I love that you can inport OPML files like your mind maps. What program do you use for the mind maps?
Hi Ken
Thank you for taking the time to write such an interesting couple of articles.
I have been in love with Scrivener pretty much since the start but it becomes even better when I find out how other writers customise their workflows and thought processes.
Being cursed with a visual brain, I start by outlining my thoughts in mind maps and then using the nifty facility to import the saved OPML file into Scrivener. It automatically lays out the binder with the scenes and chapters so I can jump straight in and do the fun bit of filling the empty folders with words.
The joy of Scrivener is its amazing flexibility. Nearly all of us get what we want!!
Happy writing….
Peter: Thanks for pointing that out. I need to play around with that some time and increase my skill set on Scrivener.
I’ve done something similar using the Keywords function in each scene.
For example, I’ve used keywords for Backstory_(Mike), Backstory_(Liz), Location_(desert), Location_(in_flight). As well, characters: Liz_(present), Mike_(present), Barbara_(mentioned), etc. can all be used.
You can change the color codes to match up for single characters, families, locations and the rest. Just don’t use spaces in your keywords or searching won’t work properly.
Locations, articles, POV, and many other keyword descriptions can be used throughout the scene structure in both Windows and Mac versions.