I’ve been meaning to do a post about how I build the models that appear on my novel covers for some time now, so here we go. I can’t fit all these pictures and explanations into a single post, so this time we’ll talk about Designs and Mounting Systems.
I’ll be using the last model I built for the Corvette novella’s, the SS Kootenai for construction examples. You can find a Google Photo Album with tons more reference pictures from this build, here. If this kind of thing really interests you and you want to try your hand at it, there are a couple of places to get more information. First of all, this DVD is where I learned many new techniques and it’s from a former ILM modeler, Fon Davis. Recently, Adam Savage did a One Day Build using similar techniques to what I will show you here. The Fon Davis video is golden, and far more detailed than Adam’s quick video.
Design
It always starts with pencil sketches or doodle drawings where I play with shapes until I have something that interests me. The original Corvette model was an older design and it set the style for the industrial design of future starships in the series. It was basically a three section ship with a head, a body and an engine separated by gridwork beams. Below is the sketch I originally drew of the Weippe.
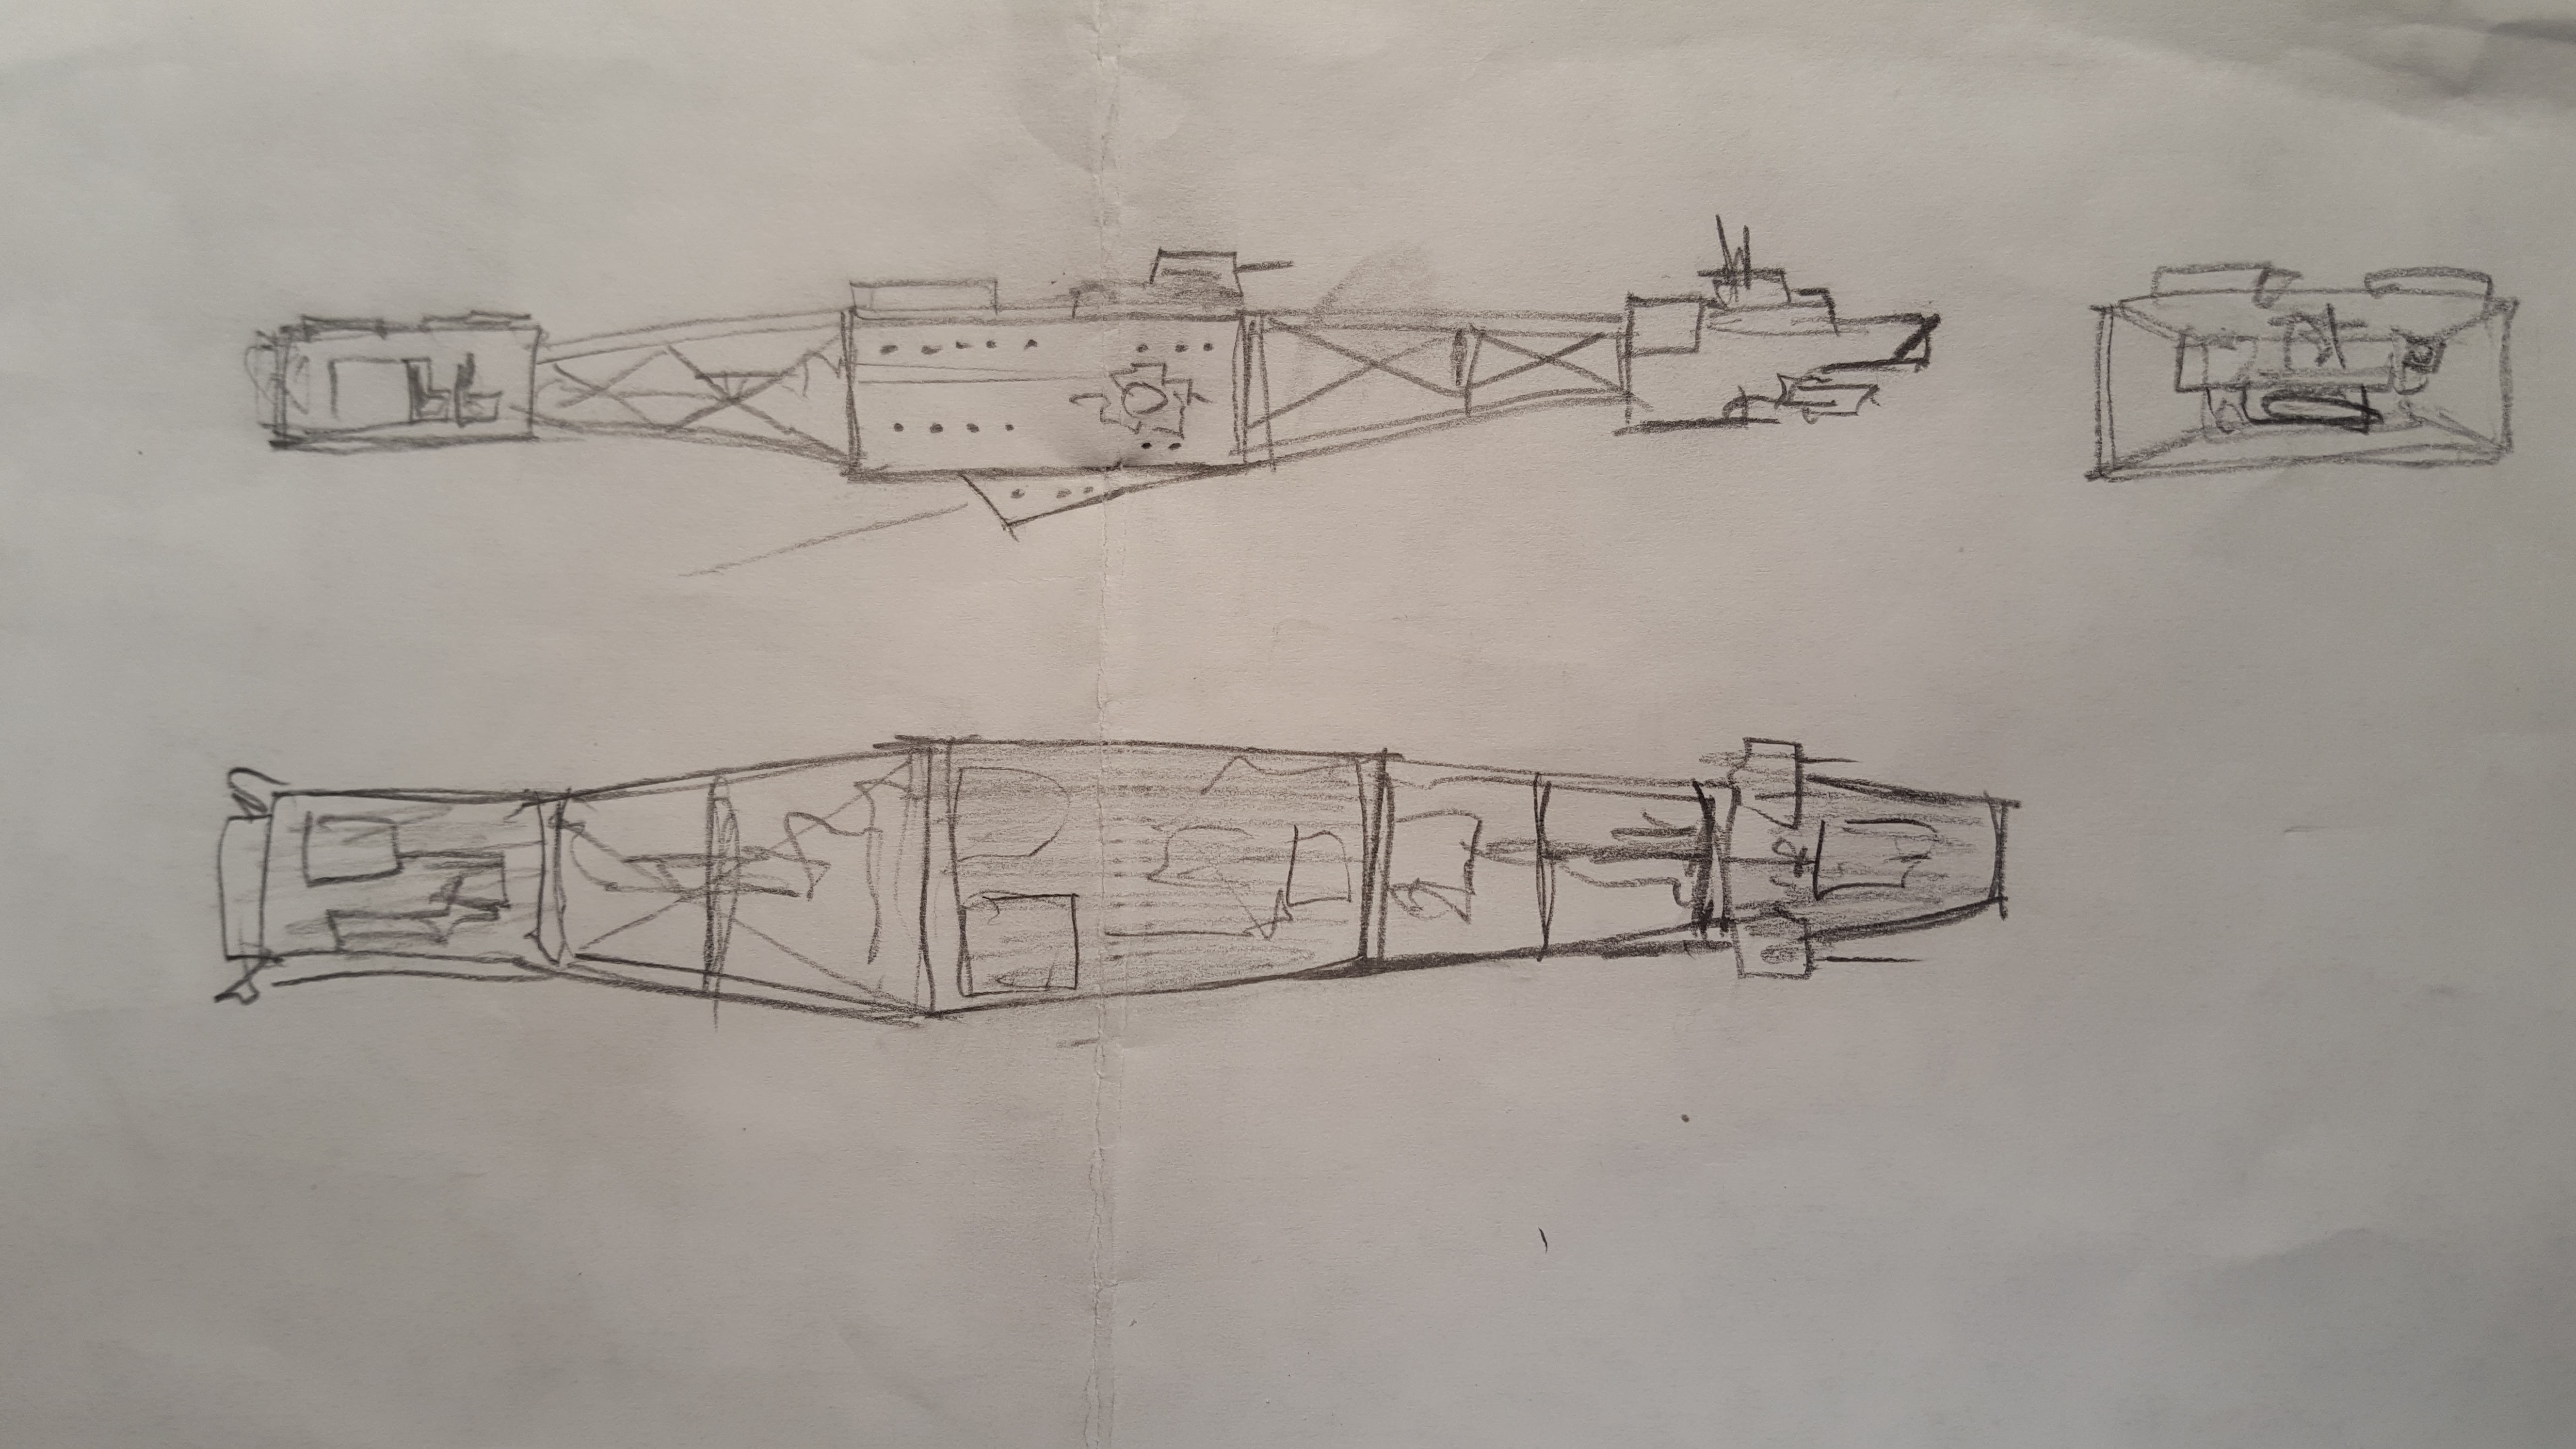
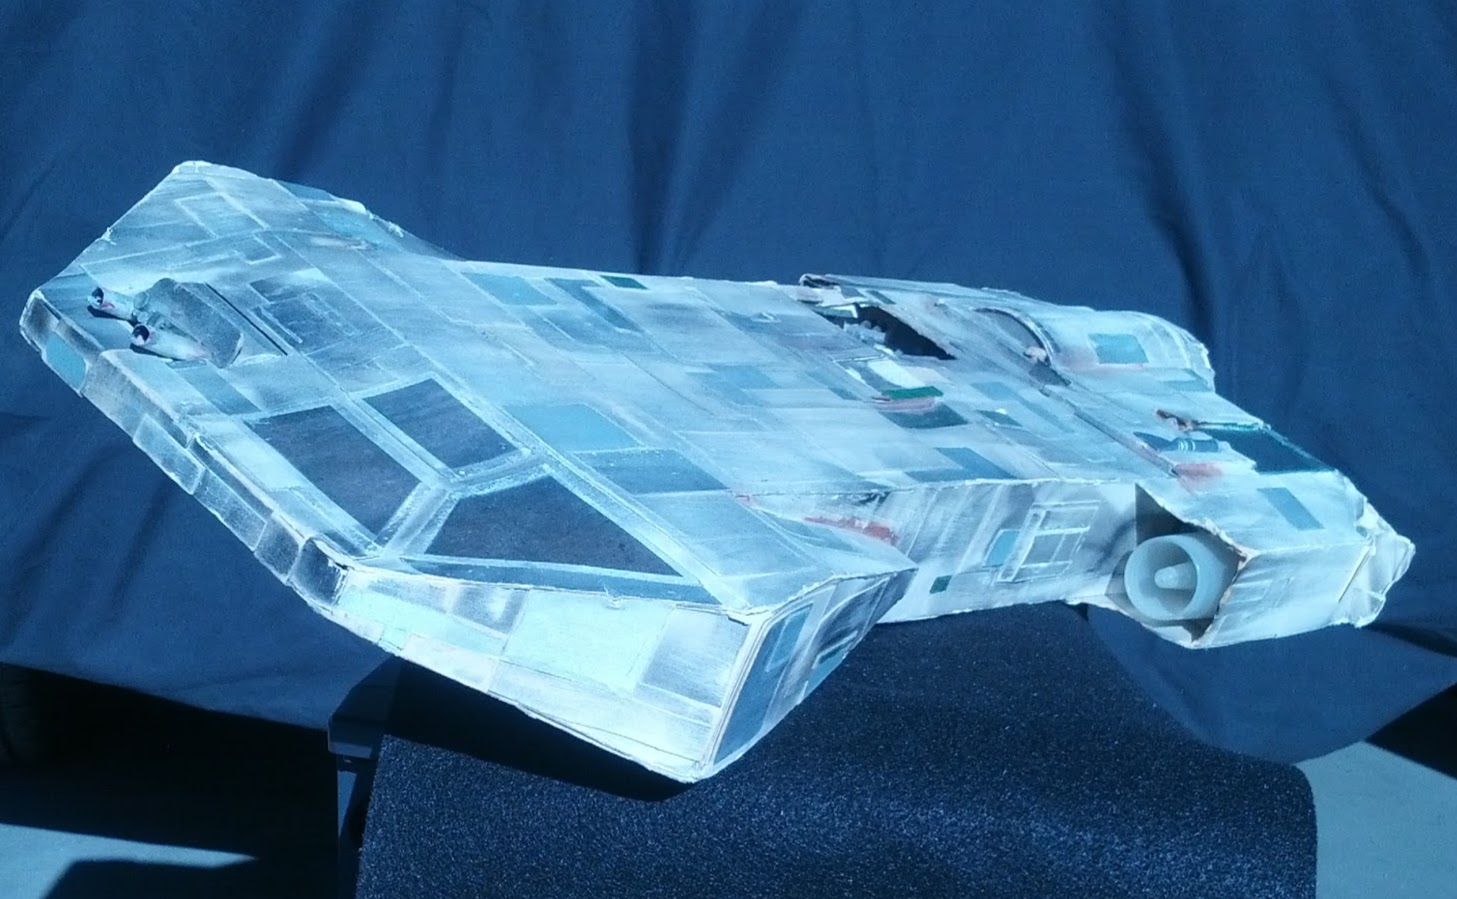
To show that starship design is evolving, I wanted the much newer Kootenai ship to be sleeker but also share many design cues from the Weippe.
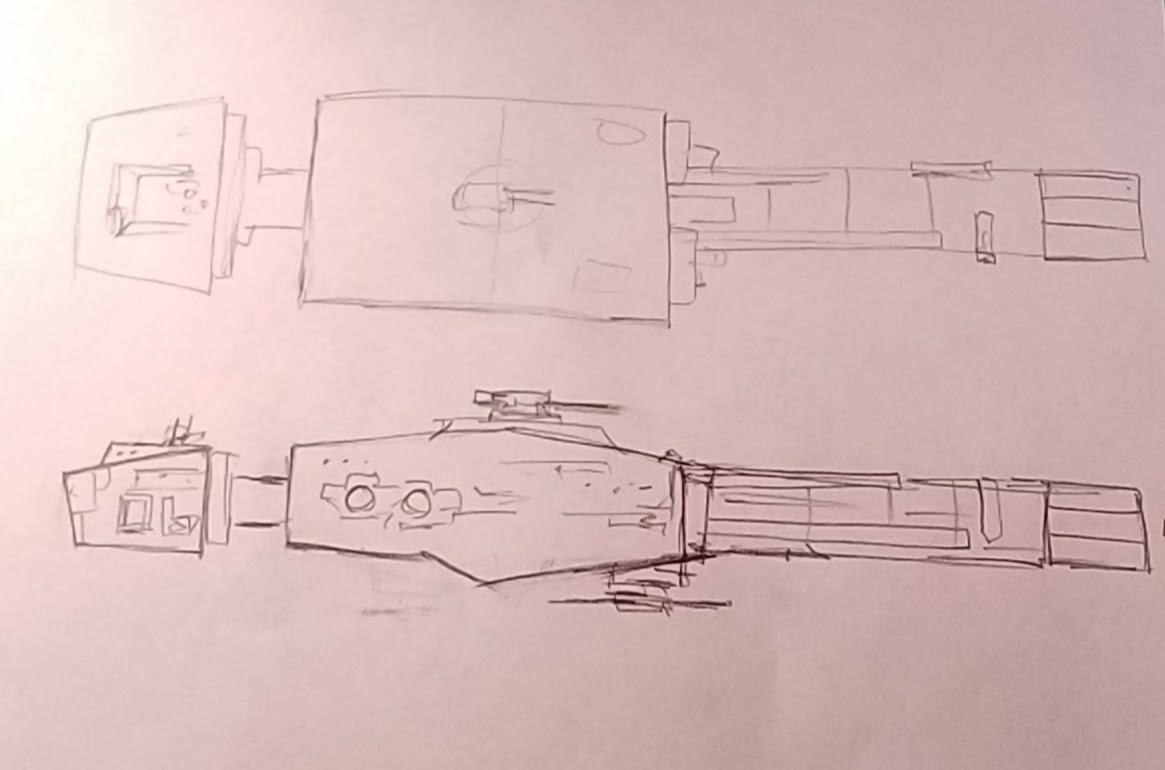
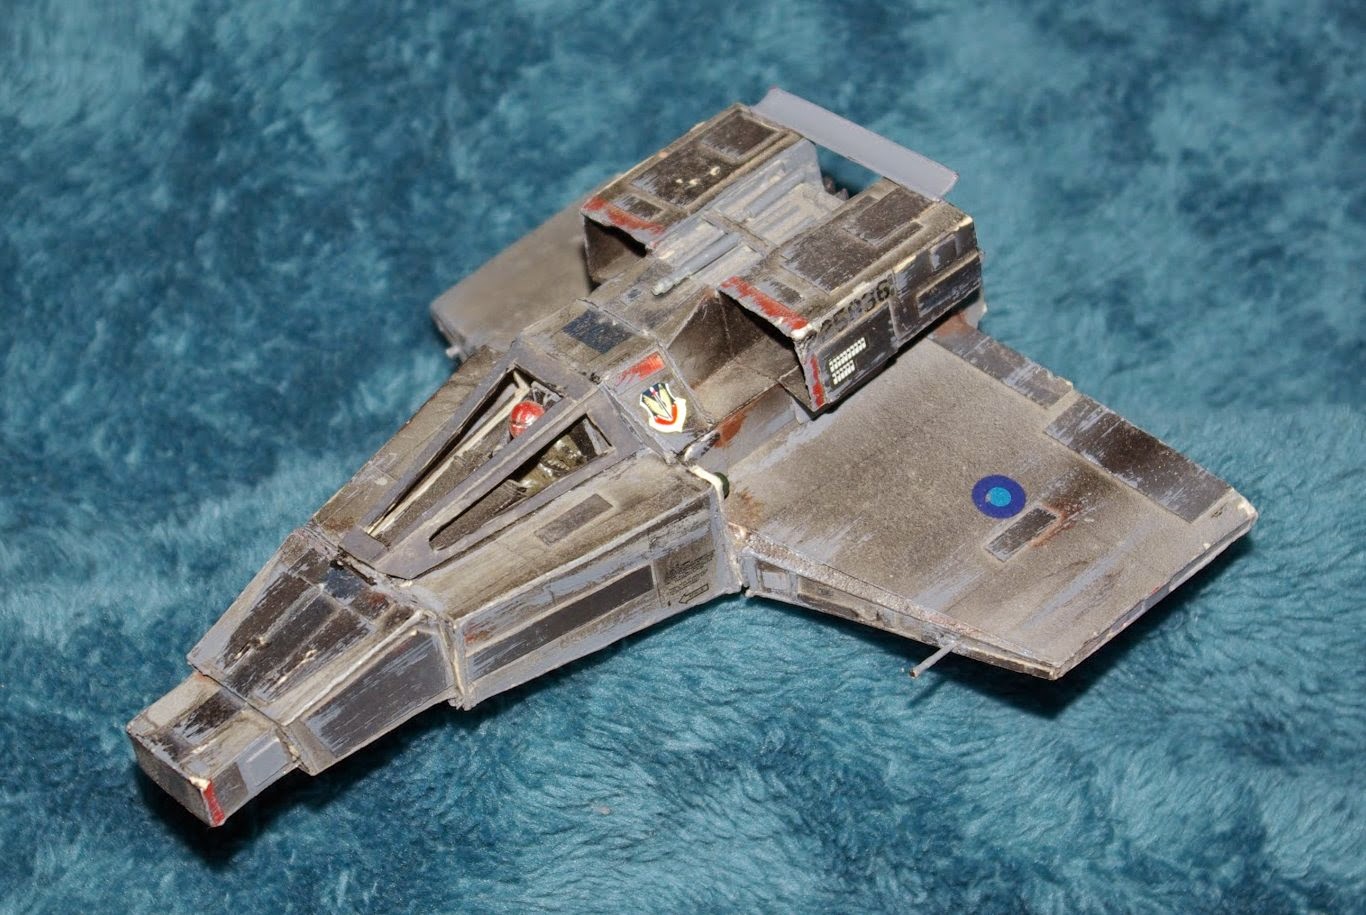
Above is my pencil sketch for the Kootenai. The shapes are similar for the head and the body but the engine is now one long tube instead of a separate section. I have already built models of what these starships look like later in the series so this design is a morph of the old, Weippe style and the next generation of warships. Below is a picture of a later model design, the GCU Griffin. You can see they are now all just boxes in line with a spine that’s a cylinder.
One of the first decisions you have to make is what scale to build your models. This is usually determined by how close you’re going to be getting when photographing them, and by how much space you have to store it afterward. I’ll never build models the size of the Star Destroyers from Star Wars (8 Feet) because I don’t have a warehouse to store them in. So long ago I chose the ship model scale of 1/350 for my large starships. When I do smaller ships, I usually build them to 1/32 or 1/24 scale.
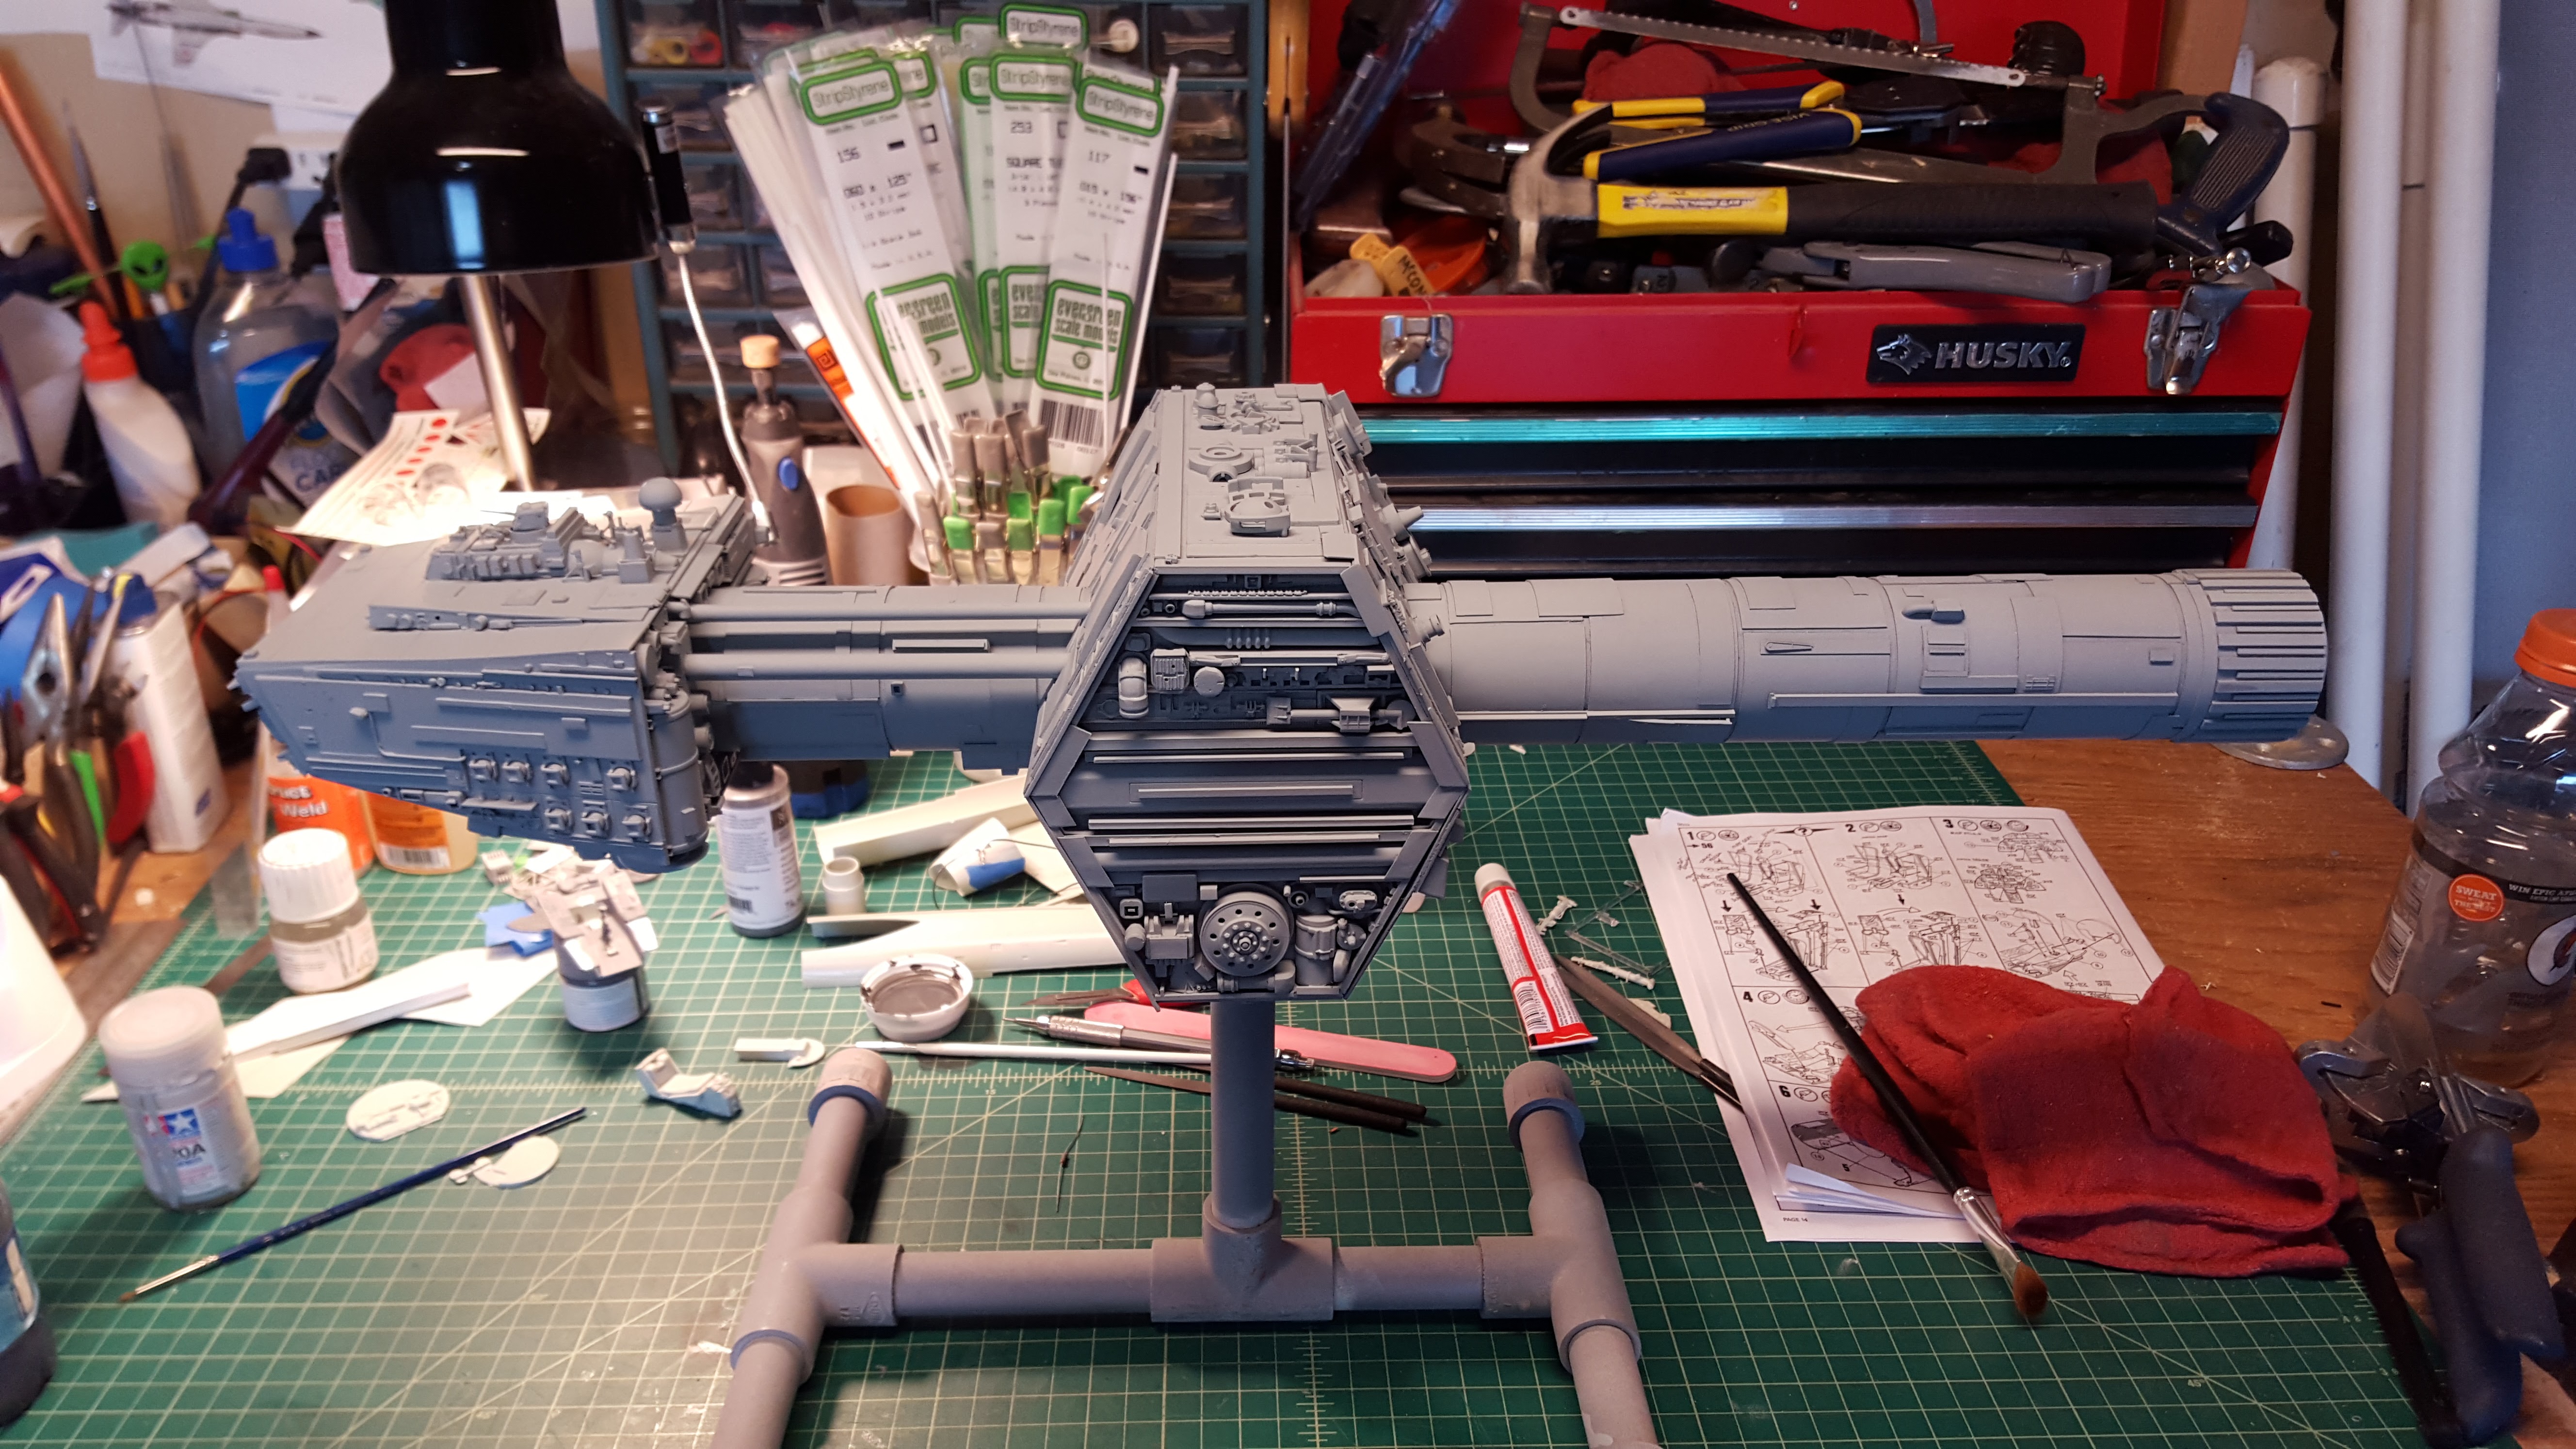
If the model is small enough, I will usually formalize the shape with a paper blueprint. Below you can see the blueprint I created for the Kootenai.
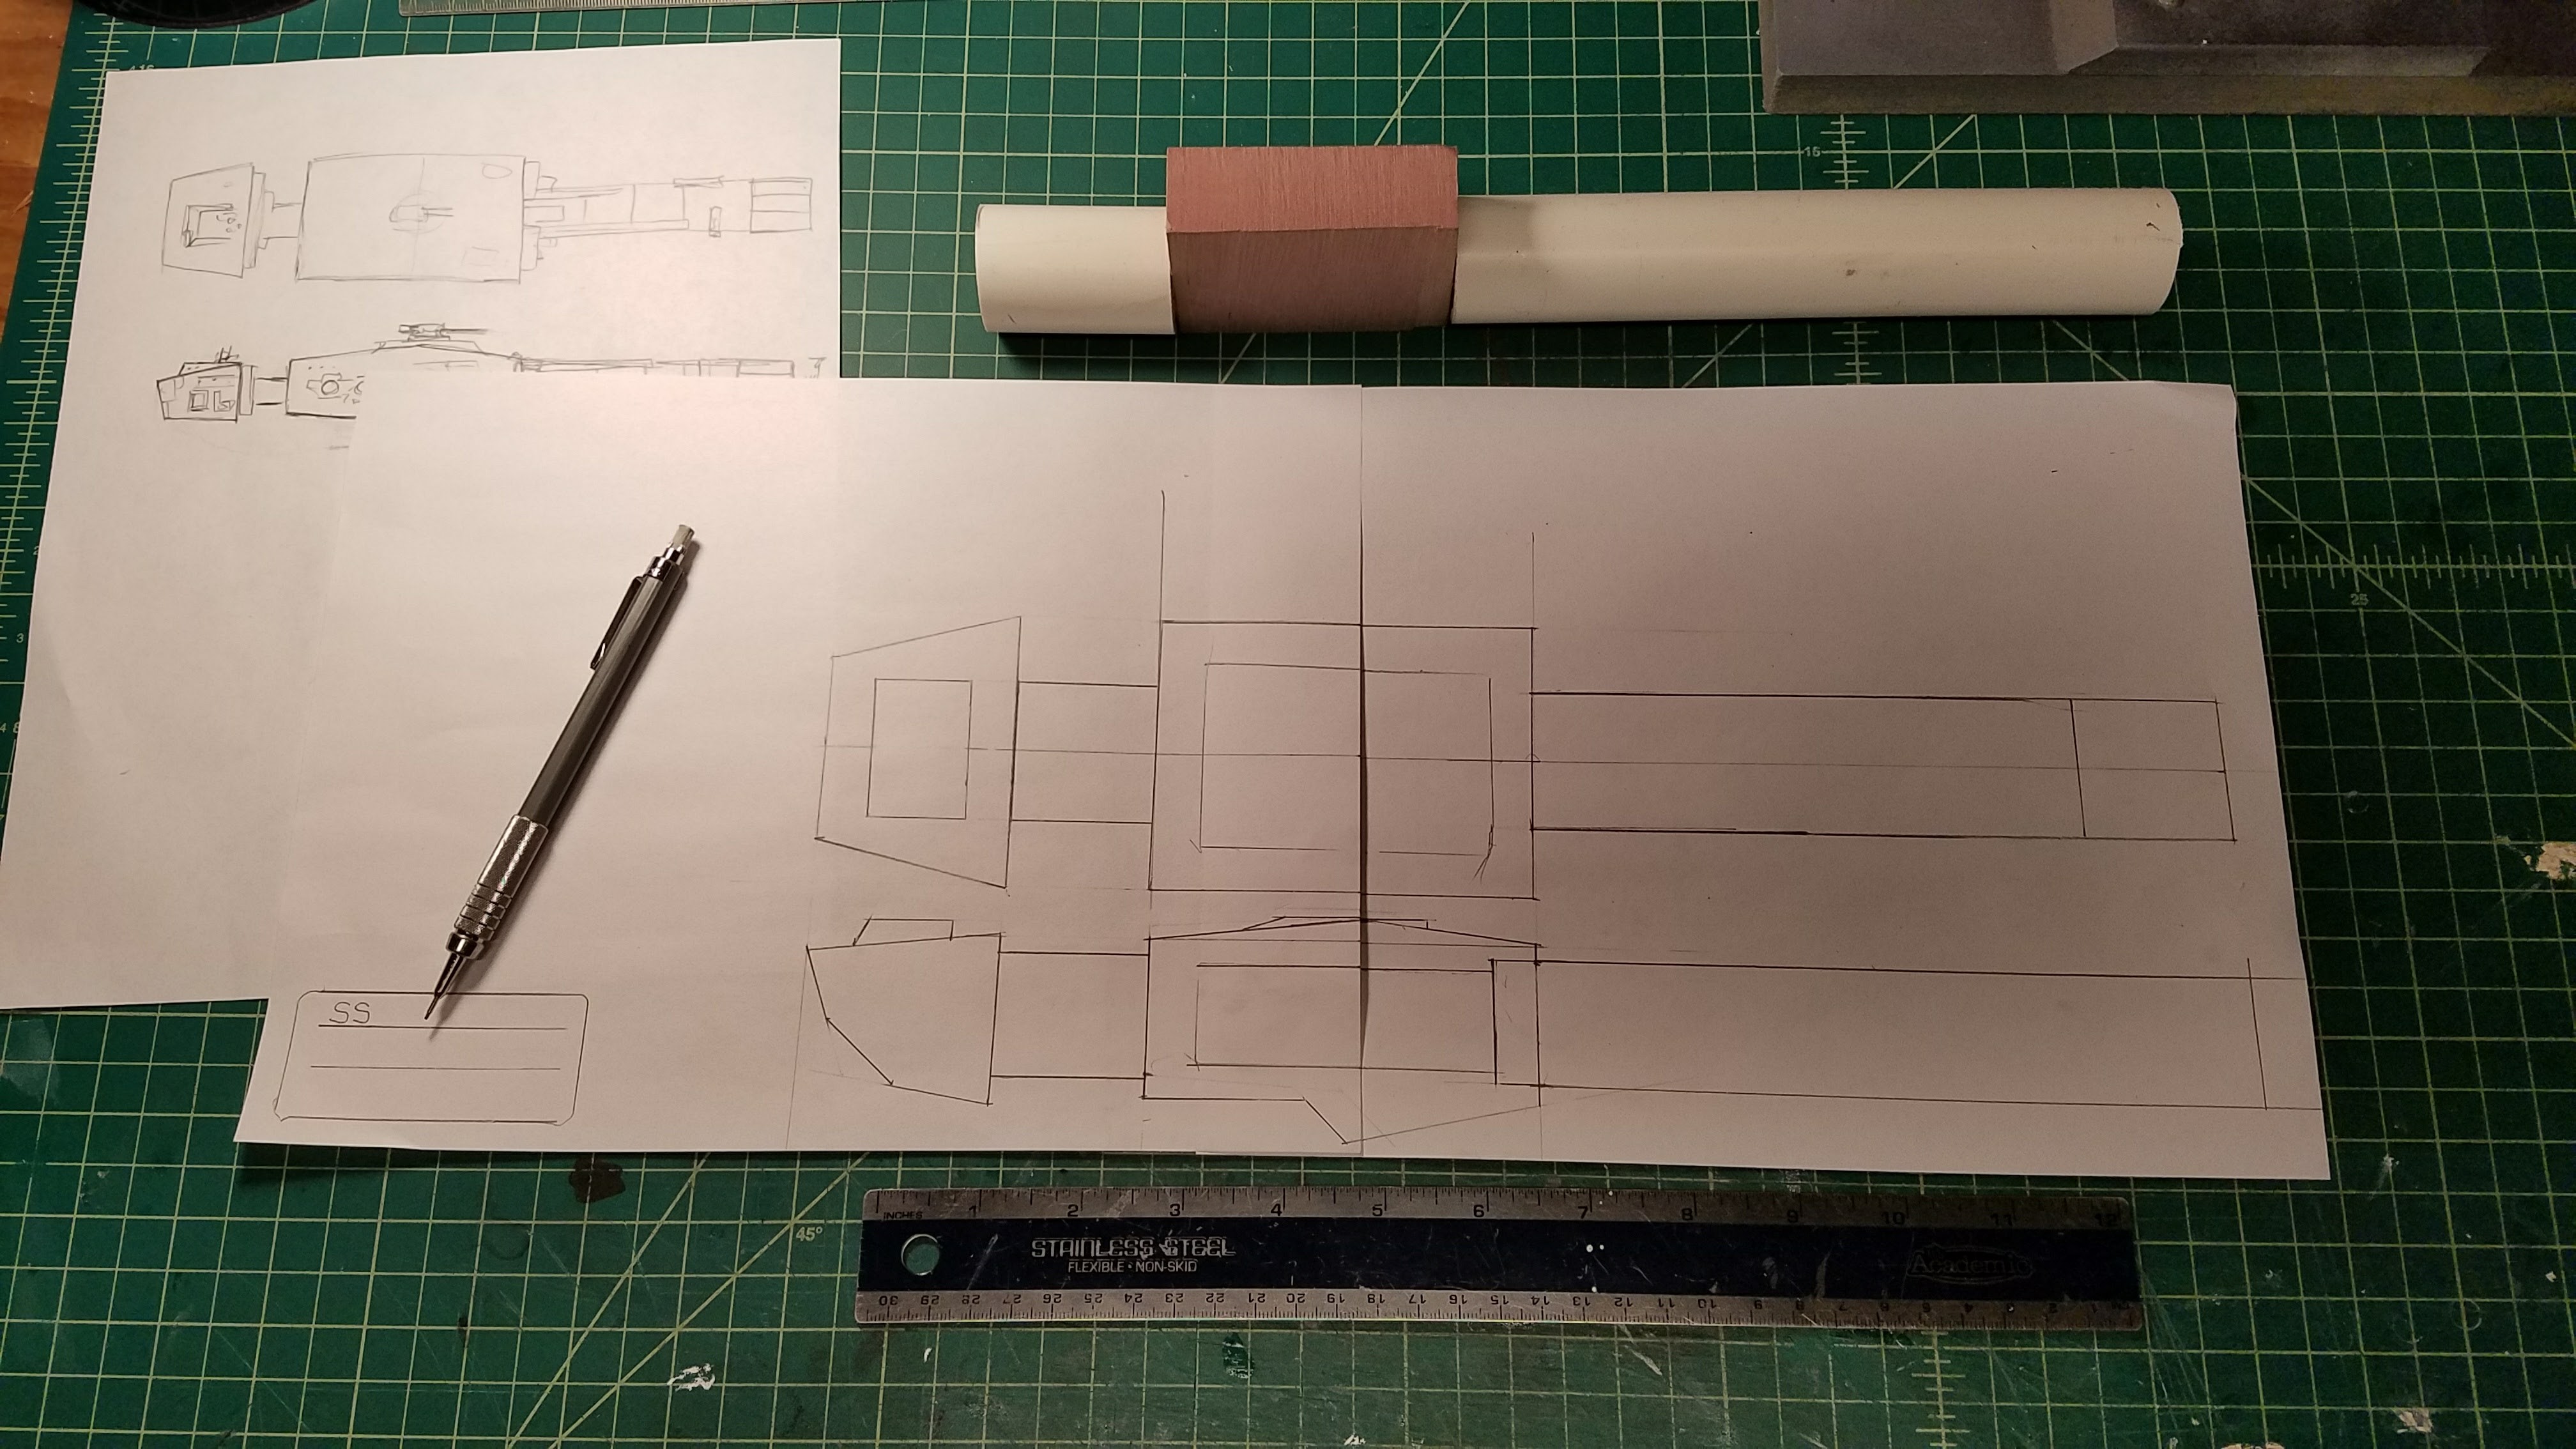
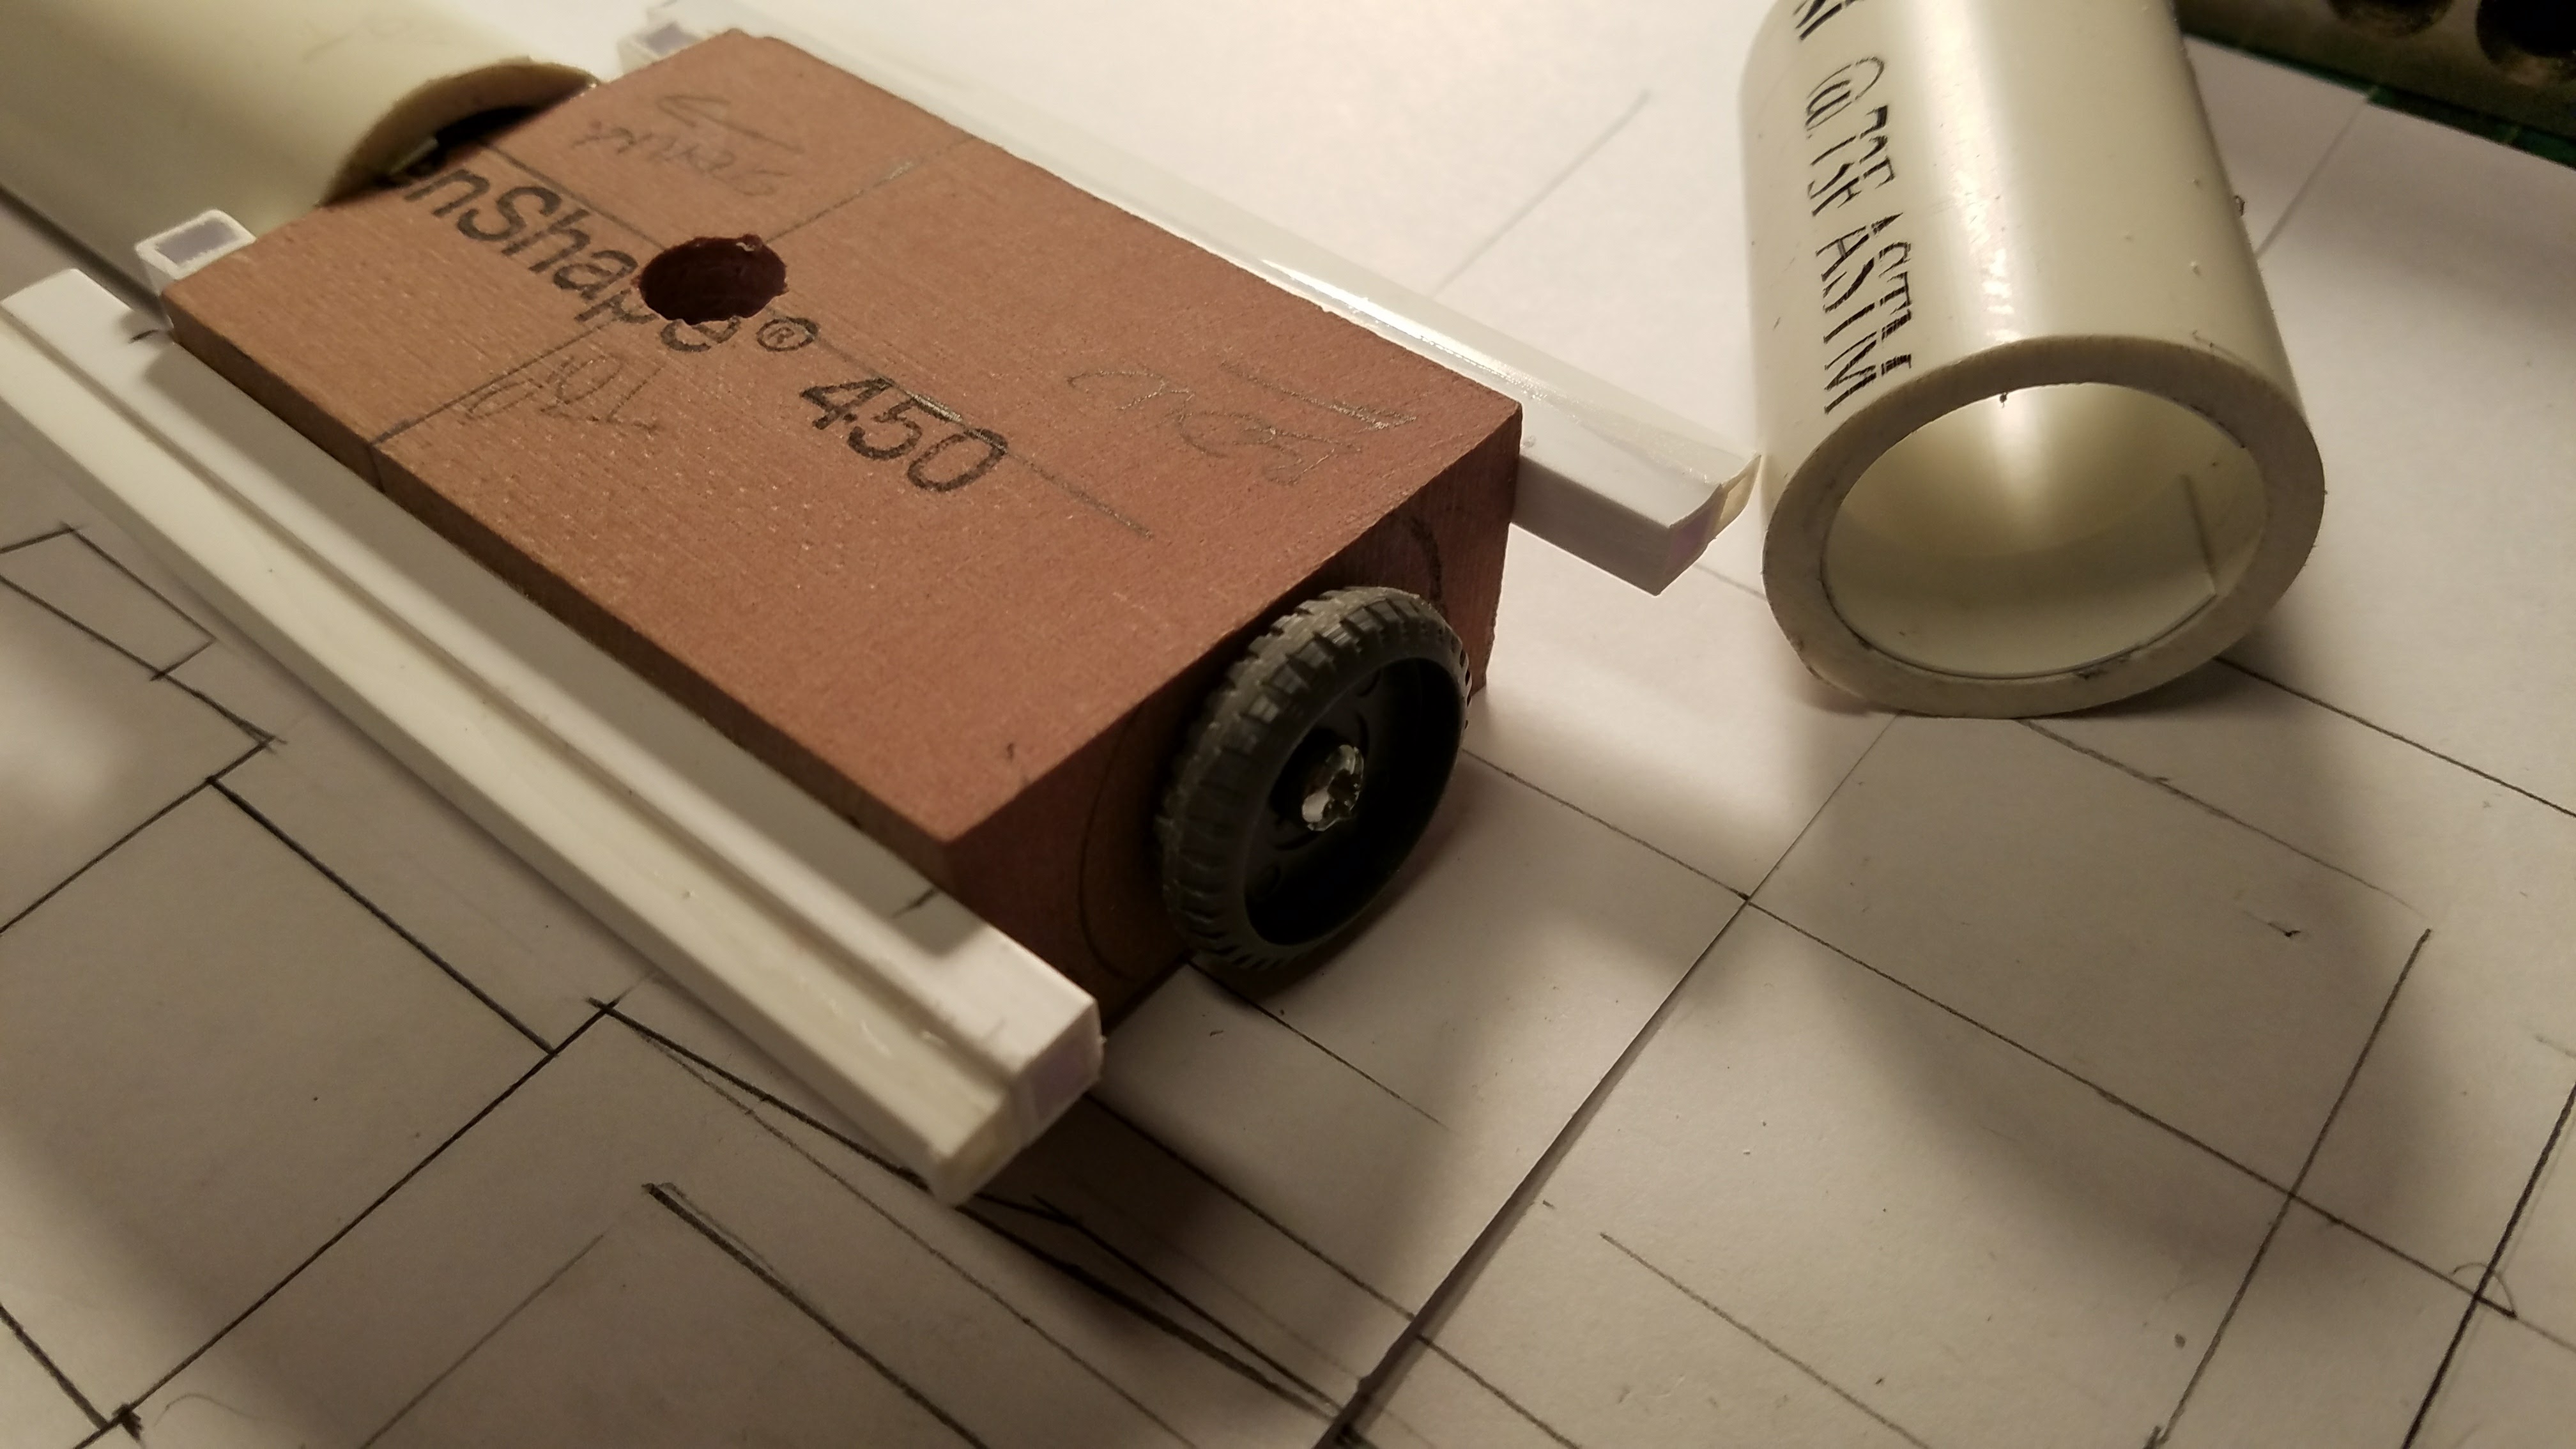
Once again, your model will have its own styling cues but for these models, I use simple block structures with tubes made from PVC pipes. So the main engine cylinder is going to be a one-inch diameter PVC pipe. The burnt orange colored block in the picture above is a material called RenShape. This is what ILM uses as the interior mount point for their models. It’s a polycarbonate block that you can easily drill a hole through and then tap for set screws. Hollywood types use a C-Stand to hold their models up when photographing them and C-stands have 1/2 inch metal rods that can be articulated in just about any direction. Lighting crews usually put heavy lights on them, so your plastic model will never be too heavy for a C-stand to hold up.
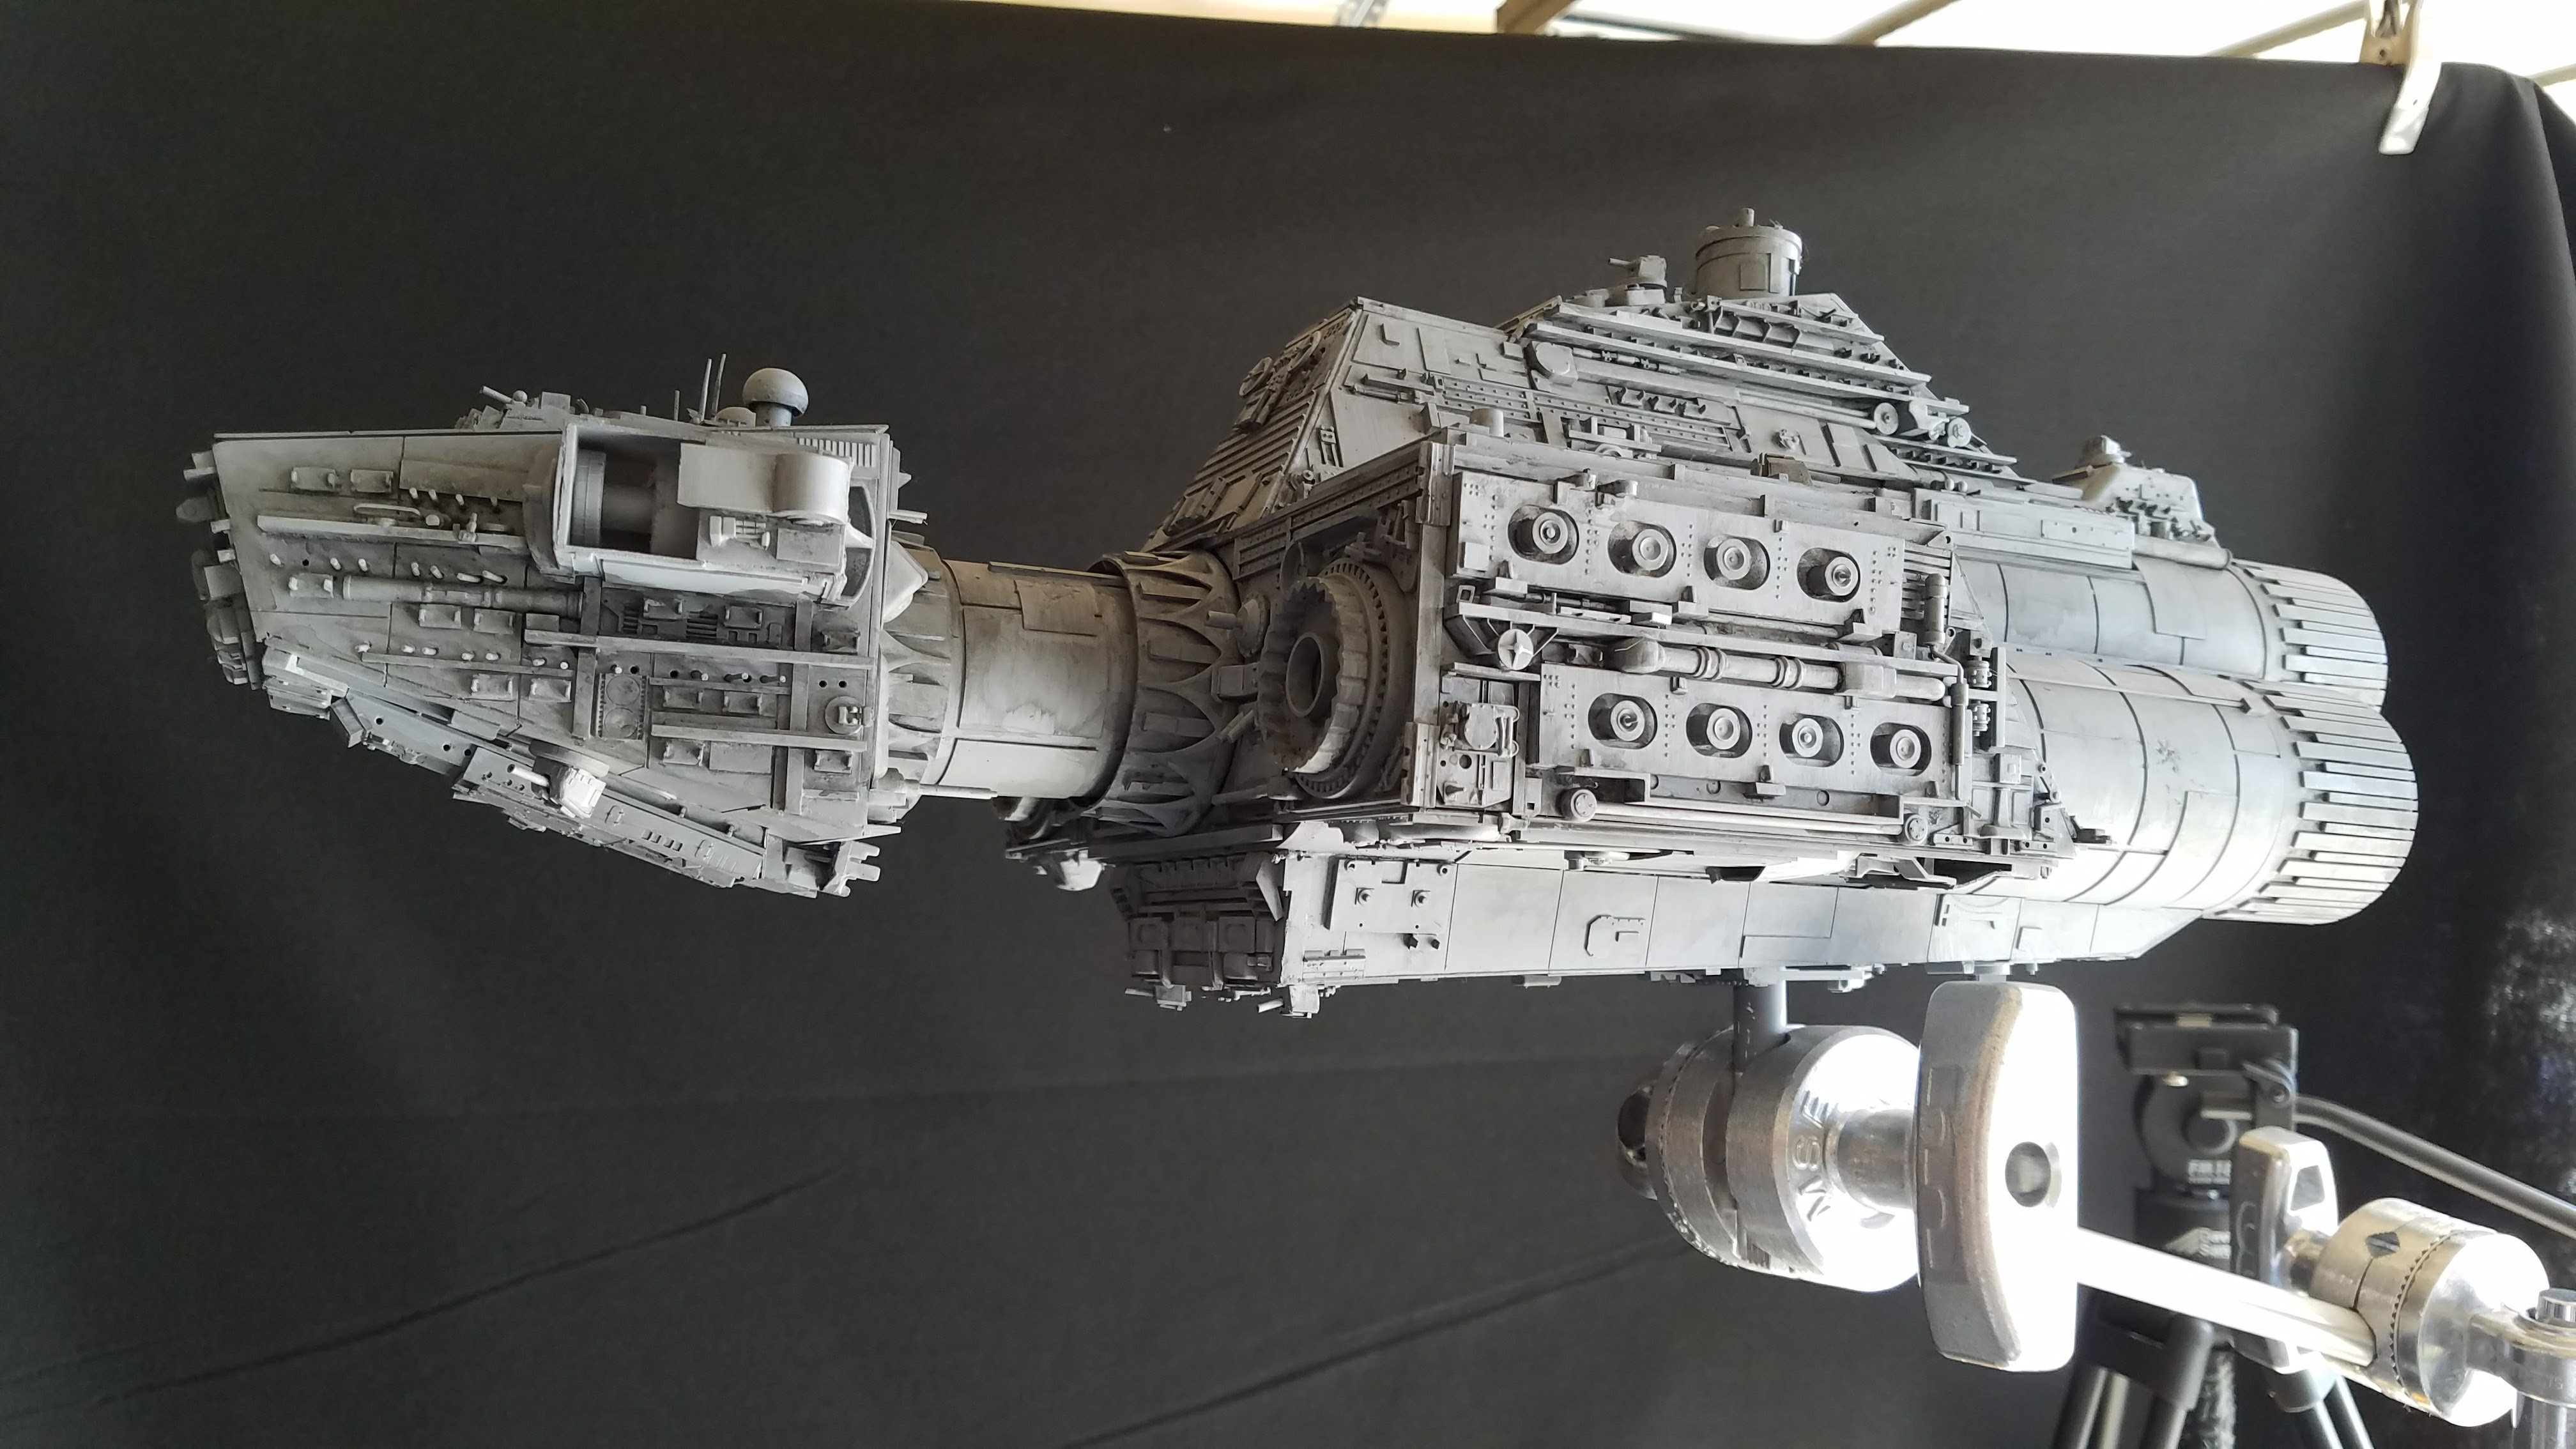
Here’s another, later model starship on a C-stand having its picture taken. The knobs are called Gobo Heads and let you position the model while keeping a firm grip on the mounting rod.
Mount Points
Since we seem to be discussing this already, let me explain how I do mounts for my models. This was a huge mystery to me for a number of years. I saw the ILM crews putting models on bluescreen covered mounts with metal rods in pictures. But I didn’t understand how they kept the models from spinning around the rods. It wasn’t until I found former ILM’er Fon Davis’s videos that I discovered the secret.
What they use is an industrial material called RenShape. Now the only place I’ve found this material is online direct from the manufacturer and it’s not cheap! But they do offer a grab box of samples that are perfectly sized for the models I make. I take a block of this RenShape and postion it in the middle of the model or where the center of gravity is. Then I determine how many directions I need to place a mountting rod. Usually it’s left and right side and front and back side. I drill out 1/2 inch holes where the rods from the C-stand will go and then I drill a smaller hole and tap it for a set screw. This set screw is how you keep the model from spinning on the rod and you have to make sure that you can get to it to tighten it and untighten it as needed.
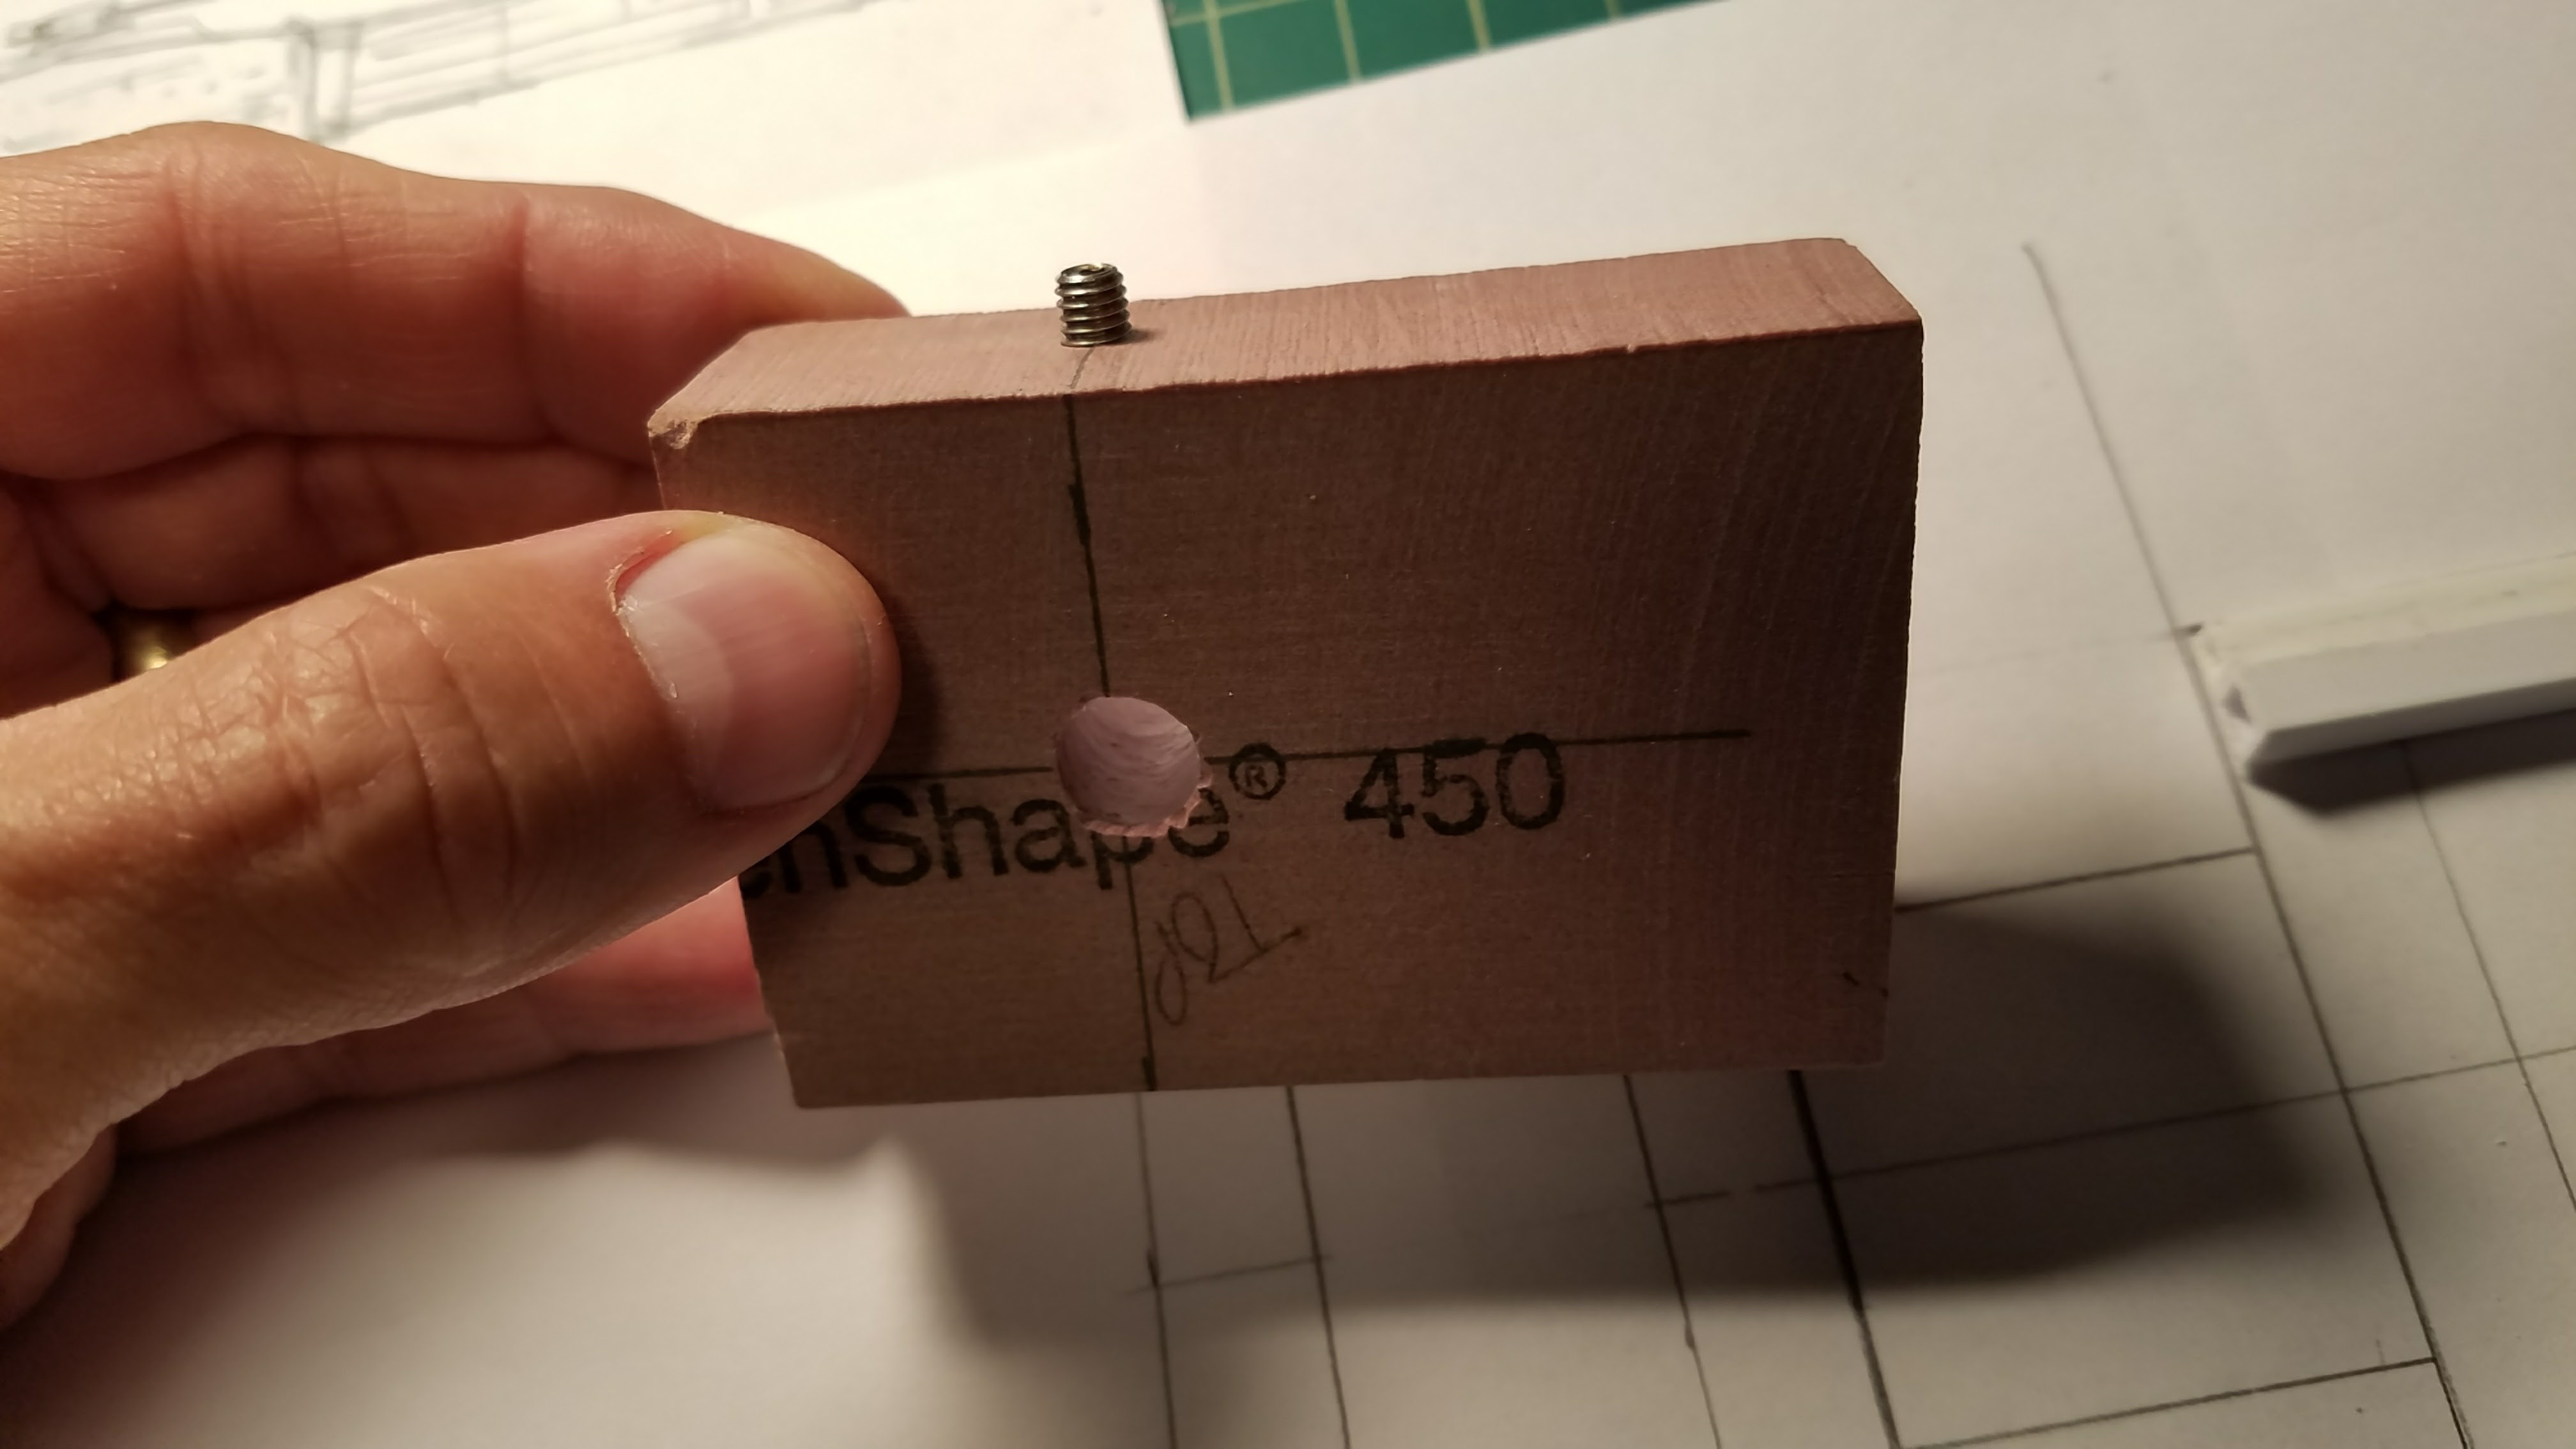
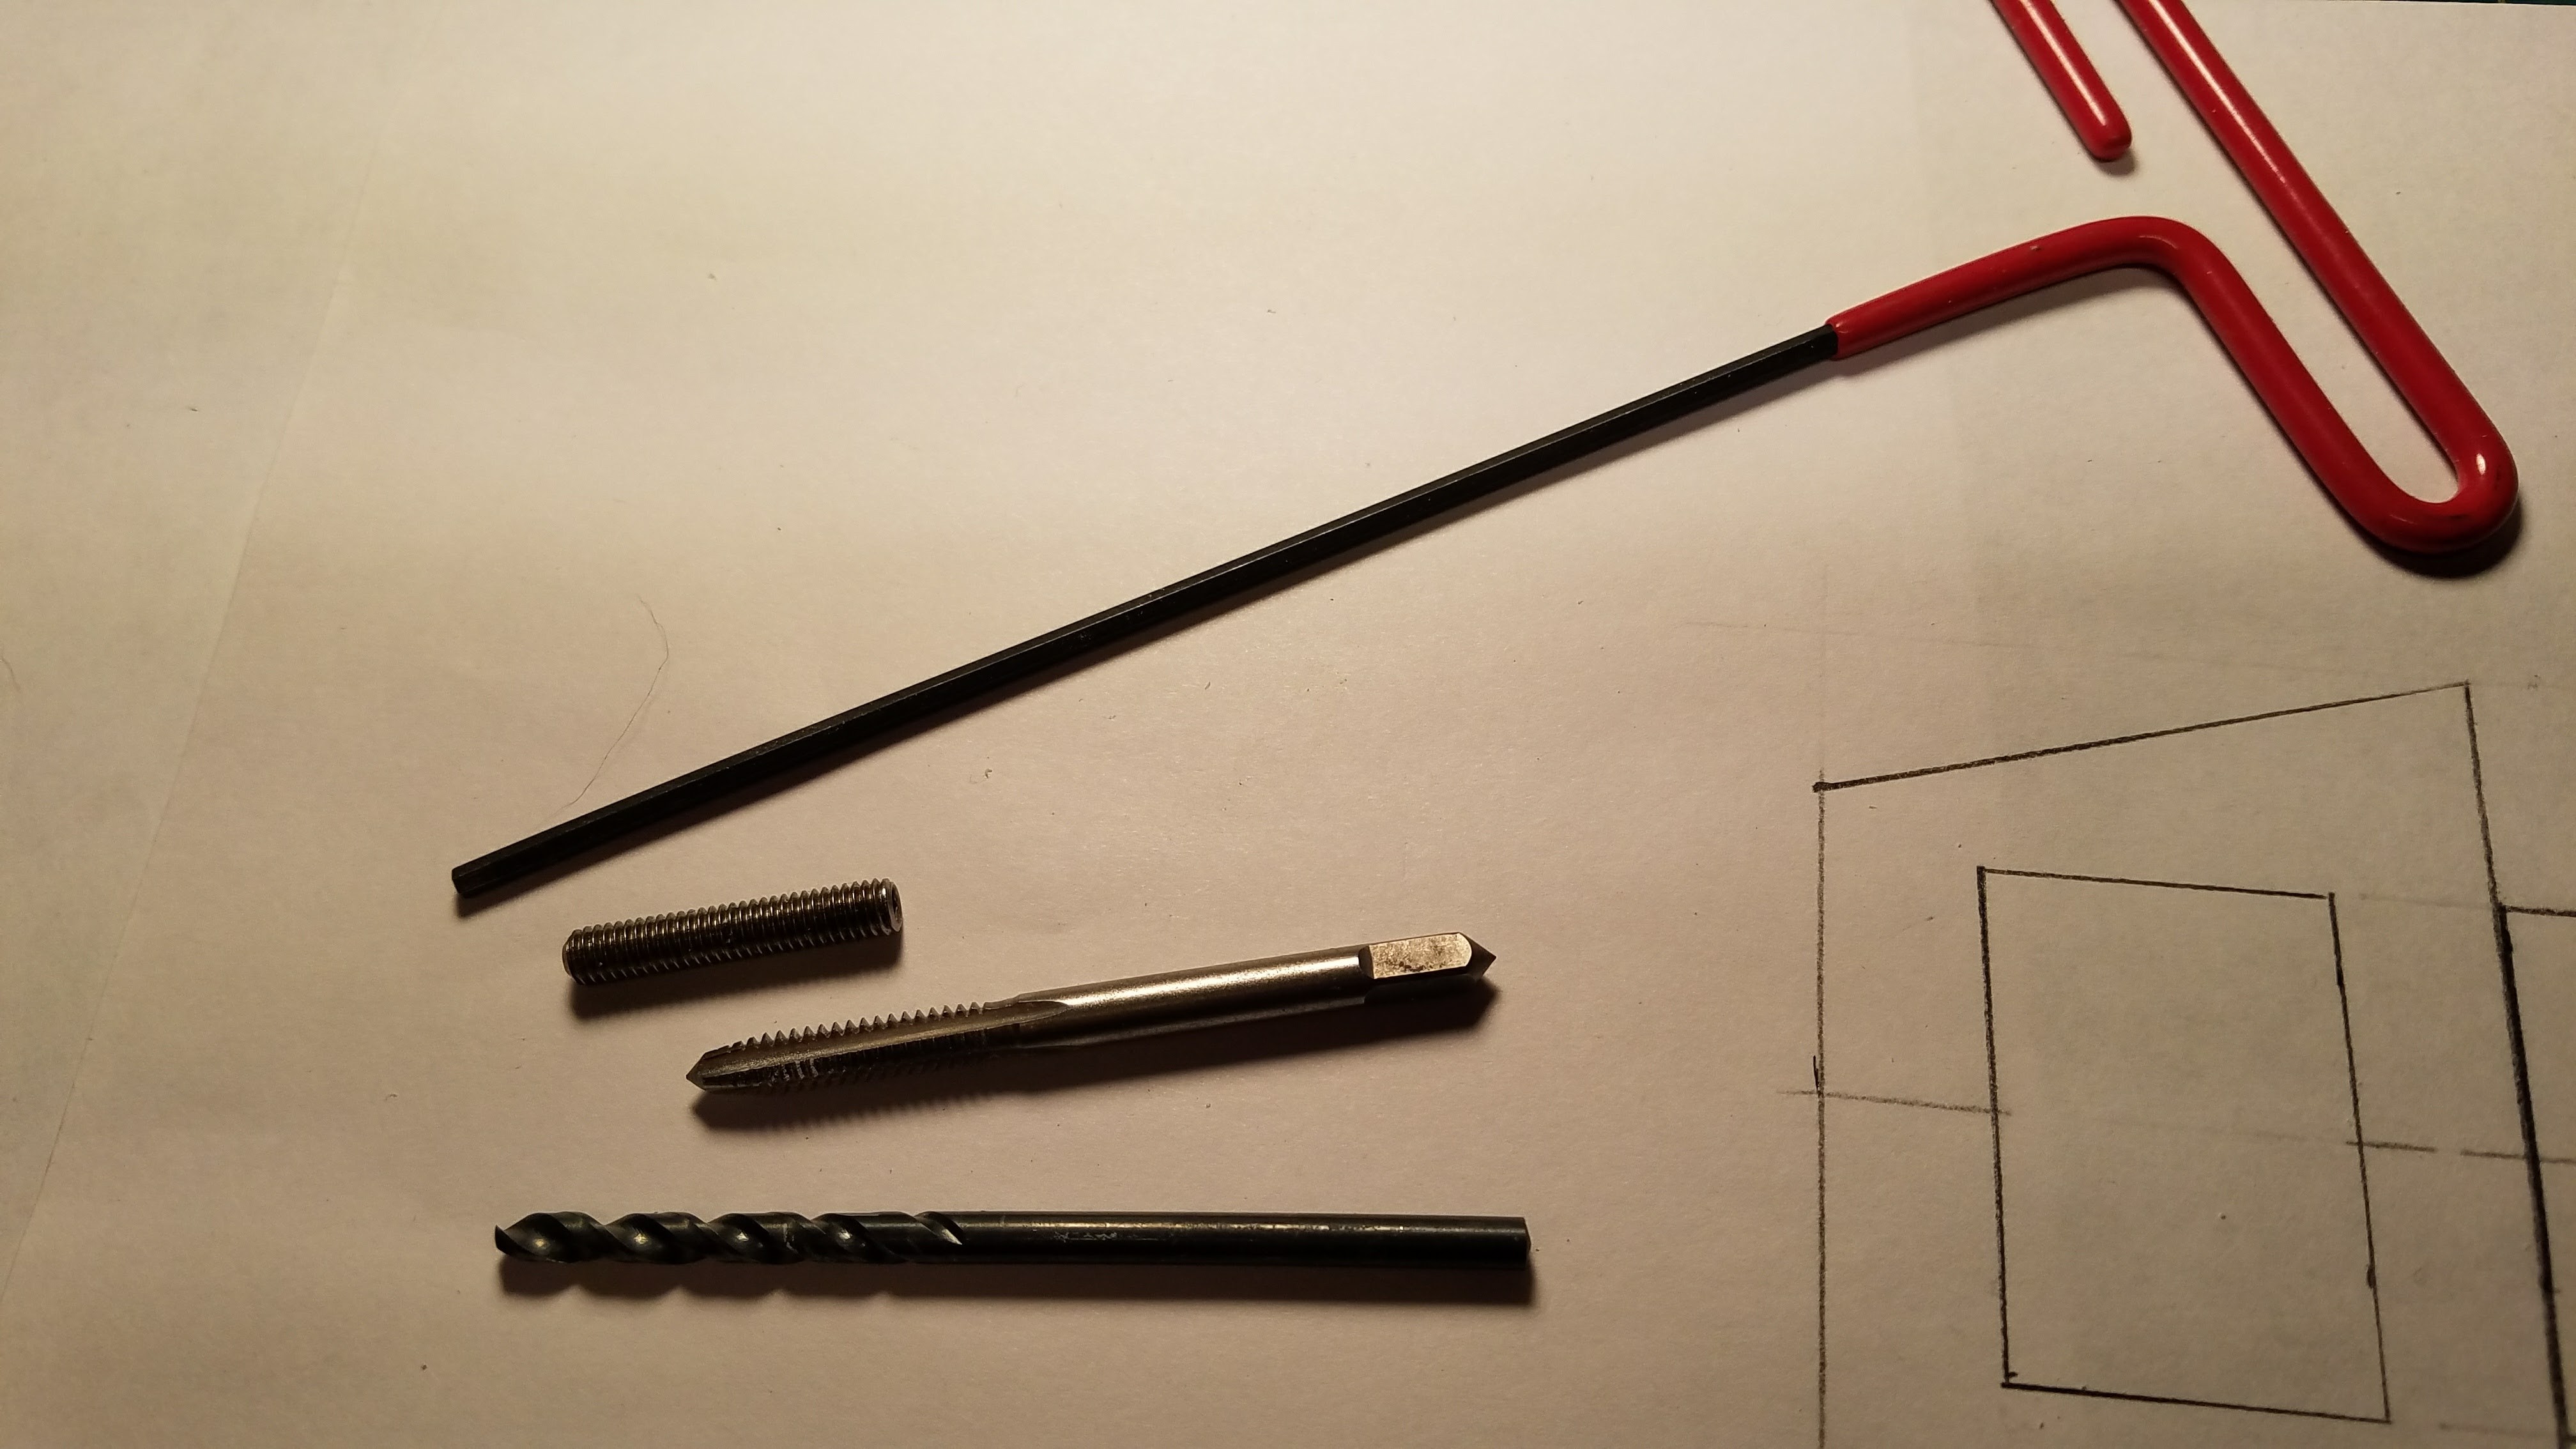
Above is a block of RenShape with the mount holes drilled and the set screw protruding from the top. Below you see the set screw which is smaller than the tap, the tap and the screw that goes inside. The red handled Alan wrench is how you turn the set screw to tighten it. You have to have a long handle on it because usually, it’s deep inside your model.
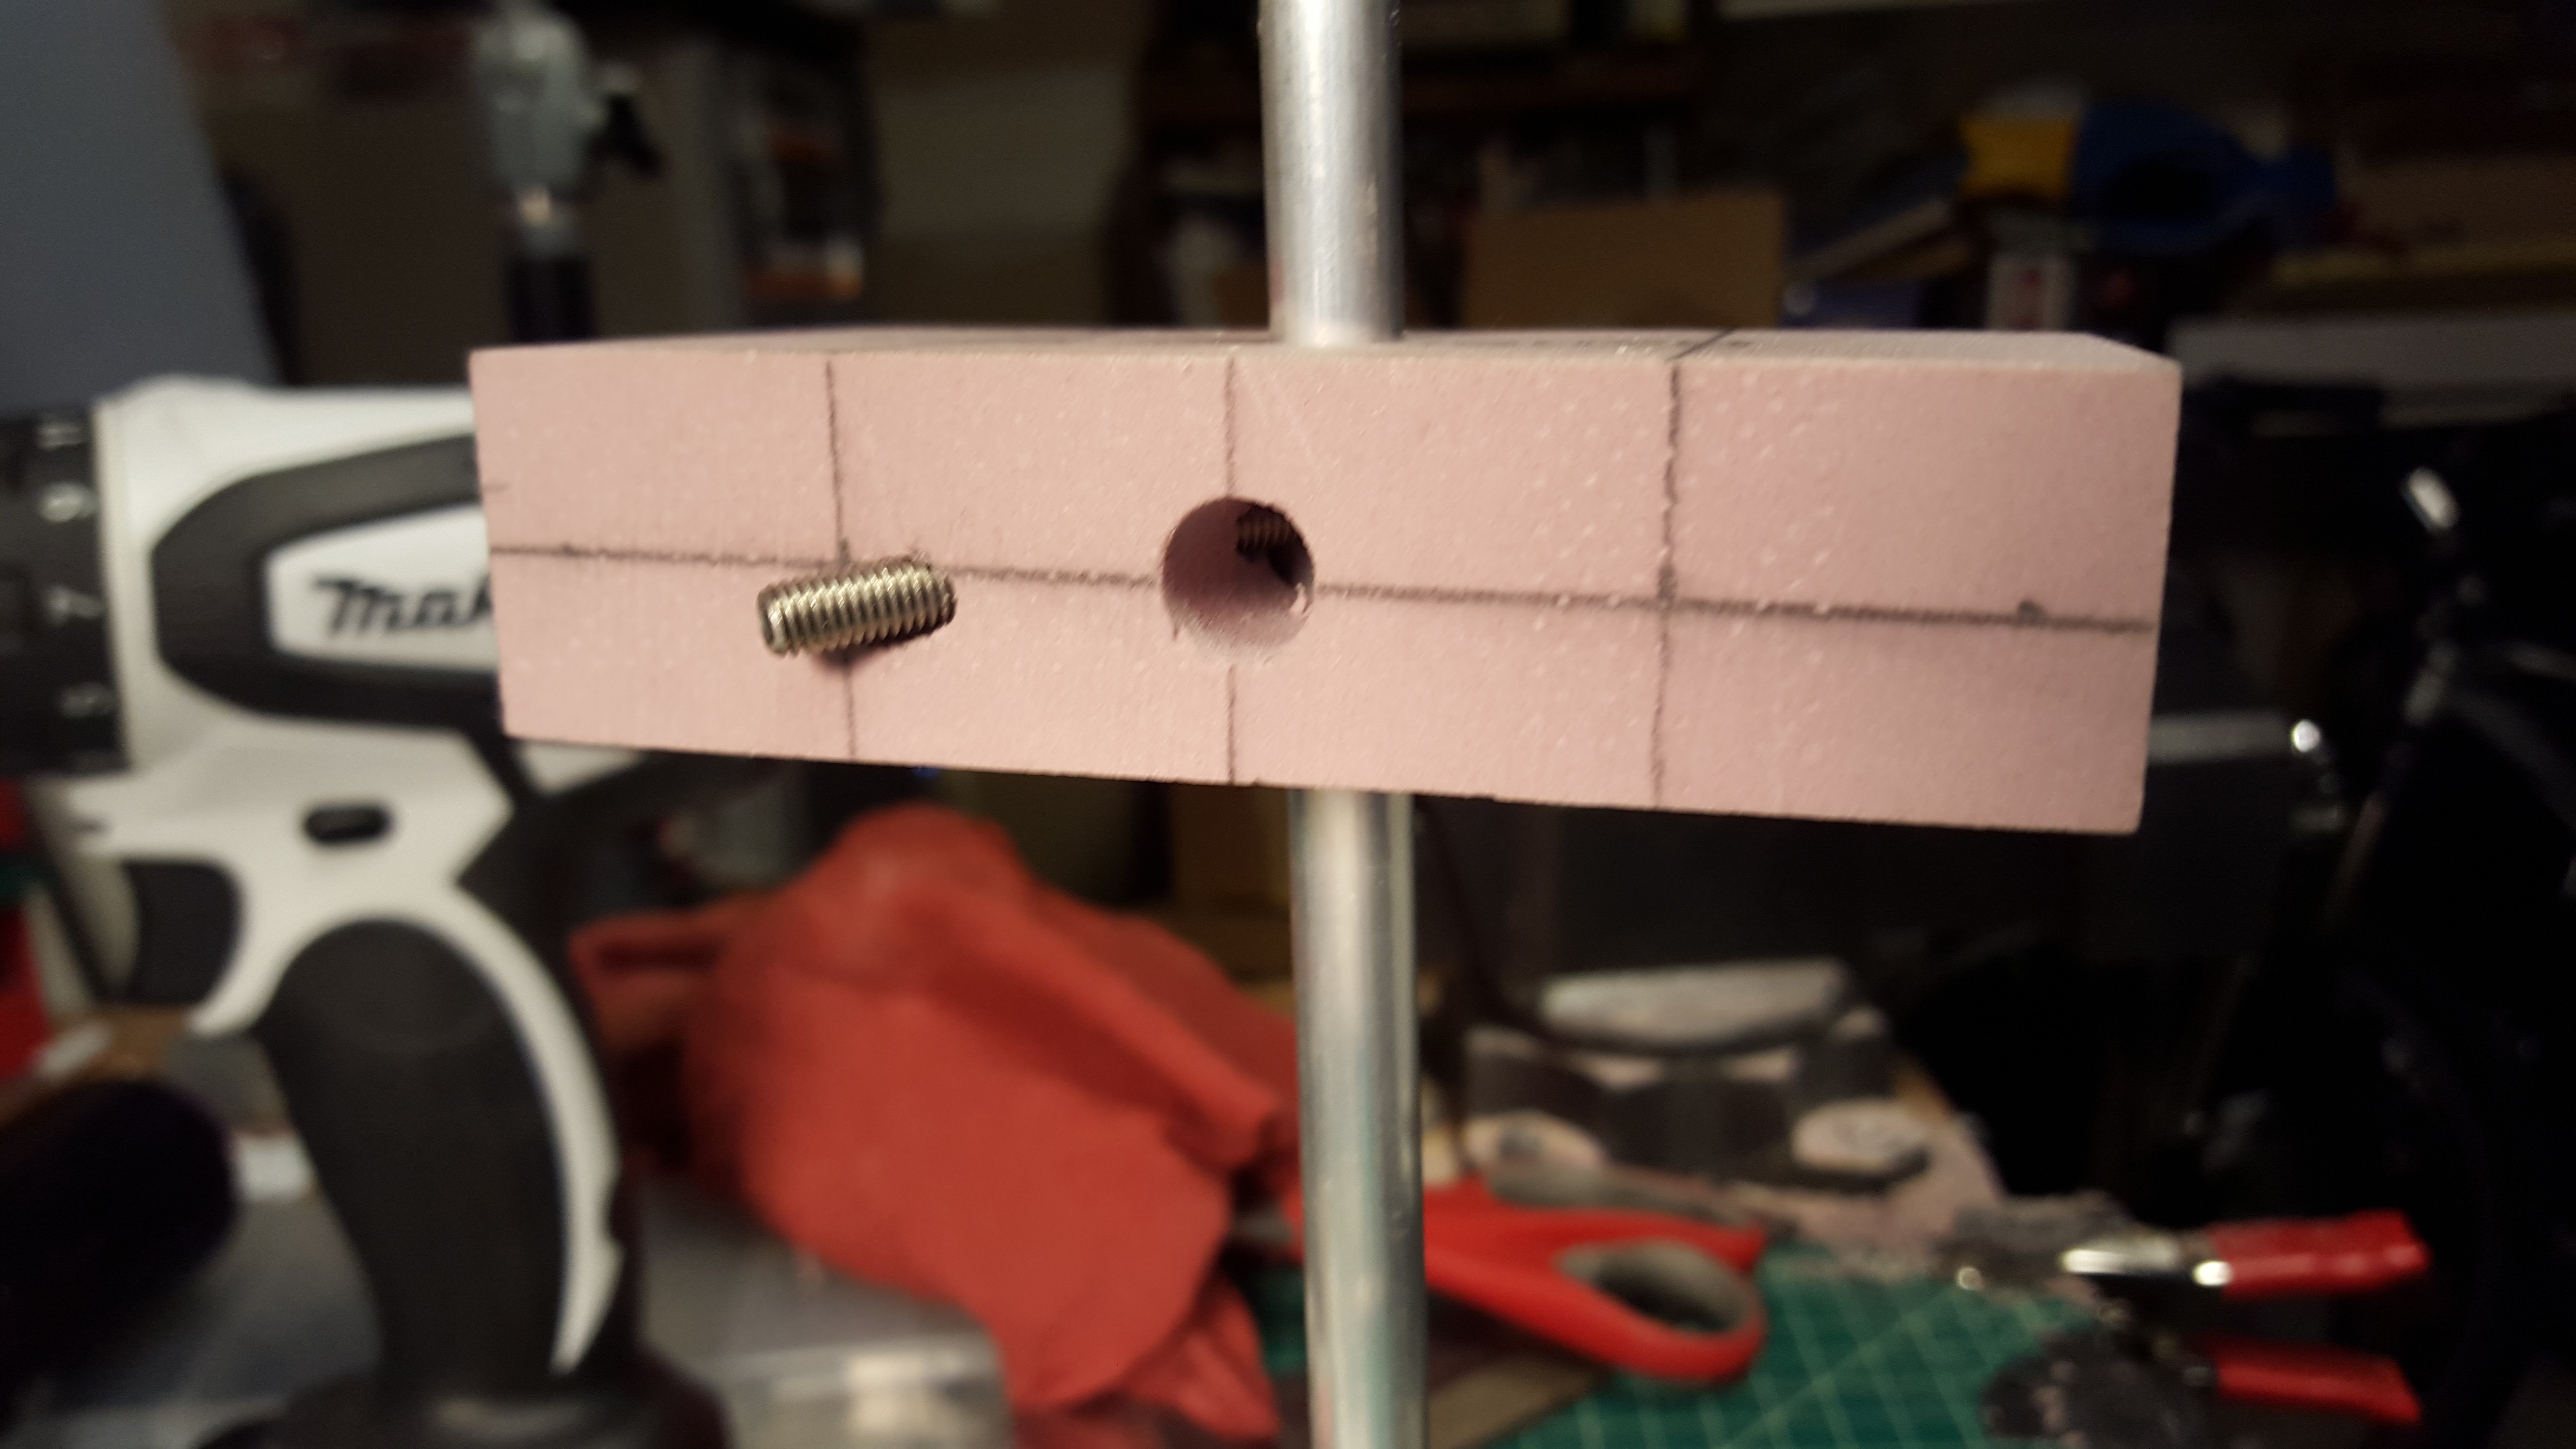
These items can be purchased at your local home improvement store like Home Depot. The bottom picture is soft, but you can see the set screw meeting up with the rod inside the RenShape. This is a different model, by the way.
Below you can see another benefit of RenShape. You can epoxy plastic directly to it, because it’s part plastic itself!
I didn’t always know how to do this, and so I’ve used all kinds of things for mounts in the past. All of them inferior to the RenShape and rod. If your spaceship model will never be photographed in a studio, it probably doesn’t need this kind of mount. Static display model mounts are covered elsewhere on the internet and you can search them out pretty easily.
Prototyping
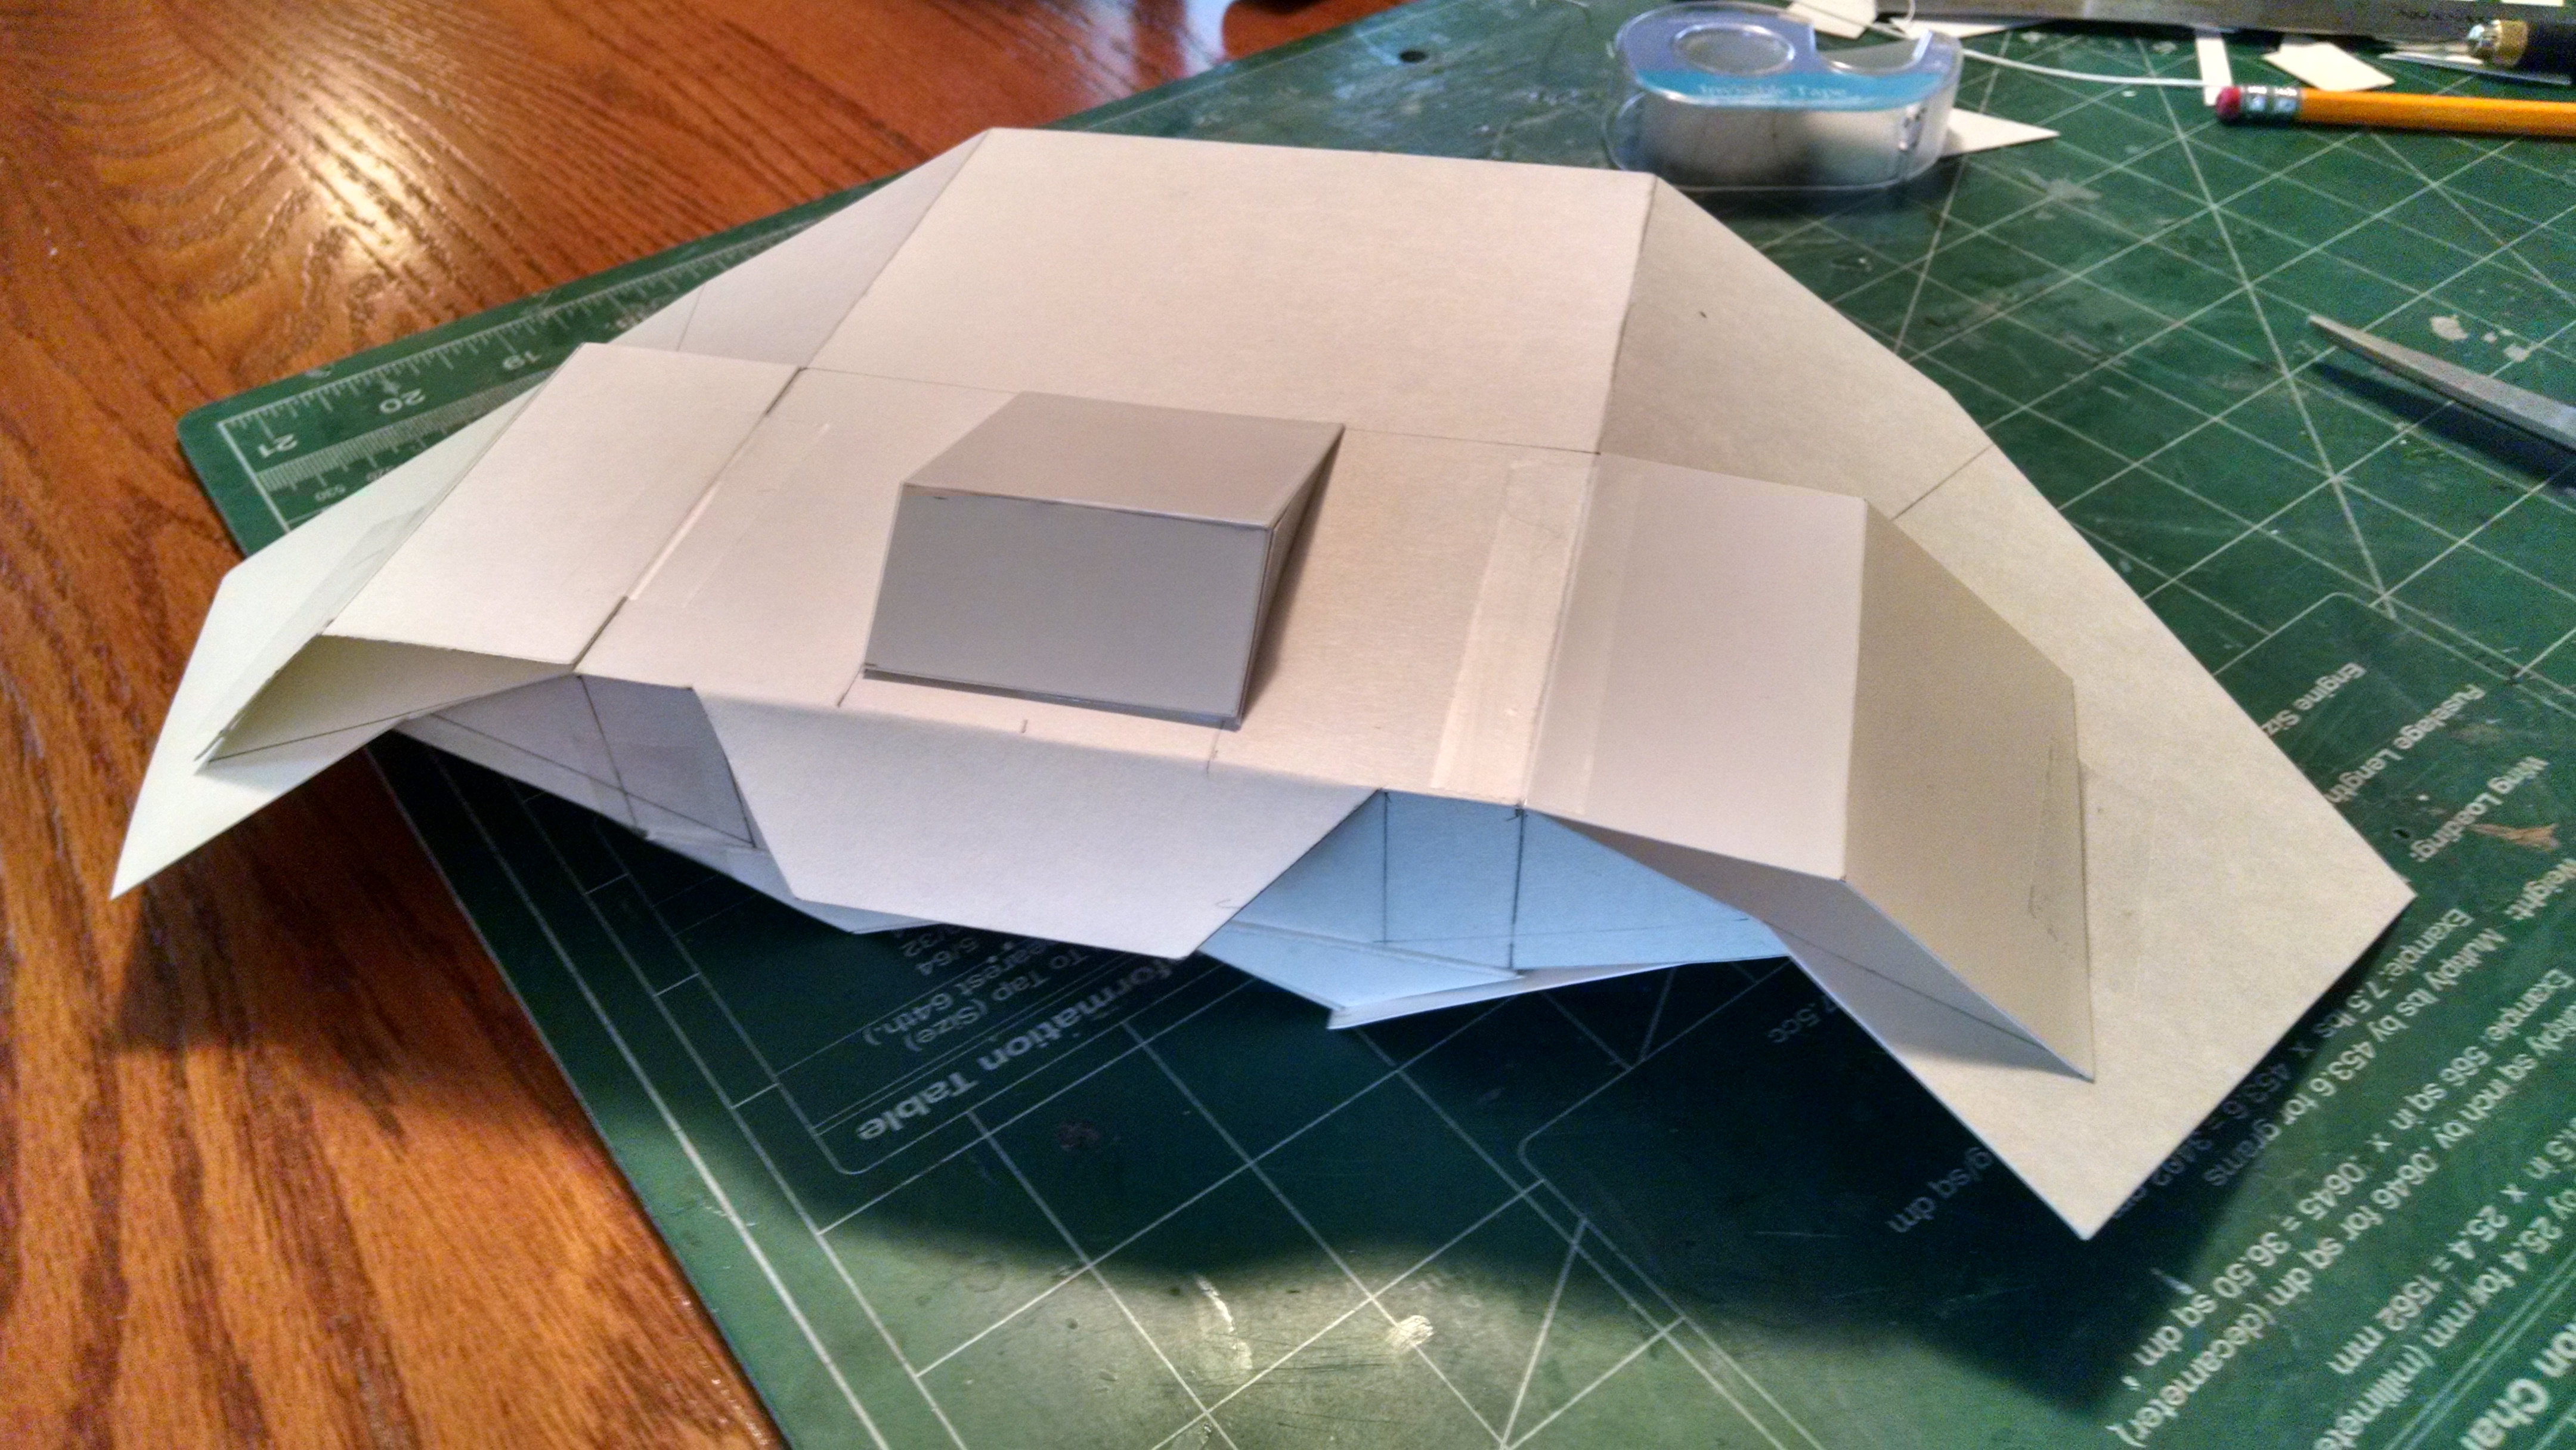
One other subject I wanted to touch on before moving on to the building up of the model using styrene is prototyping. Plastic sheets of (Styrene) are expensive, and if you’re not sure how your design will look, or if it has complicated angles or something, you will want to build a prototype in a cheaper medium. For these times, I resort to building a prototype model out of poster board. Yes, the dime store white cardstock that kids make posters from for school projects. It’s cheap and all you need to build with it is Elmer’s white glue, a hobby knife, scissors, and a ruler and pencil.
When I first started building models of my own design, all of them were built from cardboard. Below is a model my friend and I made for a film we made in Junior High School. It’s older than many people reading this blog, and it’s made entirely of cardboard. So is the one under it from the same vintage.
But for prototyping, you just need to rough out the shape, so it doesn’t have to look good. When I built the cover model for K’Nat Trap, I had to do the whole model in cardboard to get the strange angles right. The upside to doing that was that now I had a template in the same scale to build it in styrene.
Next post we’ll get into boxing and framing with sheet styrene.

