
This is the first part of a series of posts where I describe how I go about detailing a scratch built starship. Detailing usually doesn’t happen until after the model is boxed in or shaped by plastic. Roughing out the intended shape is my least favorite part of the whole process, but if you don’t have a sound platform to start with, your model will wilt and become unstable under the weight of all the stuff you will be adding when you detail it.
Detailing has three major types: Panel lines, greeblies and scratch building. Panel Lines are achieved by inscribing the plastic base shapes with lines and shapes, greeblies are all the tiny model kit pieces or interesting plastic bits and scratch building new and interesting shapes is done with extra styrene that you always have on hand.
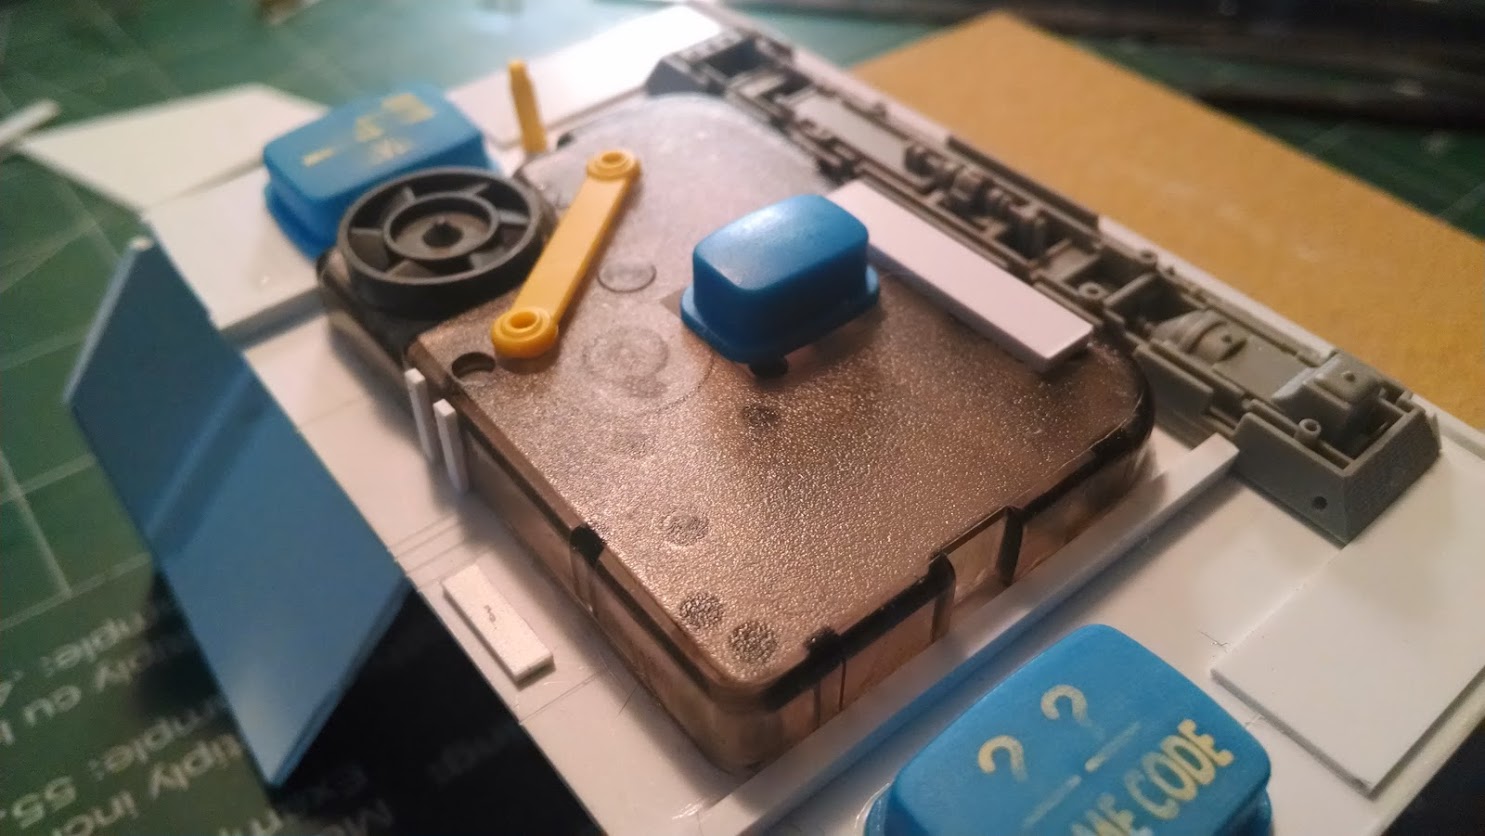
Here is a smaller starship model after it’s boxed-in with plastic. It has a solid RenShape core with a set screw mount and a few pieces set on top of it to get ideas going on what to do with the greeblies. The main gun turret is from a German destroyer kit and those squarish pieces behind it are keys from a kid’s computer keyboard. Everything else is just .060 styrene sheet or PVC tube.
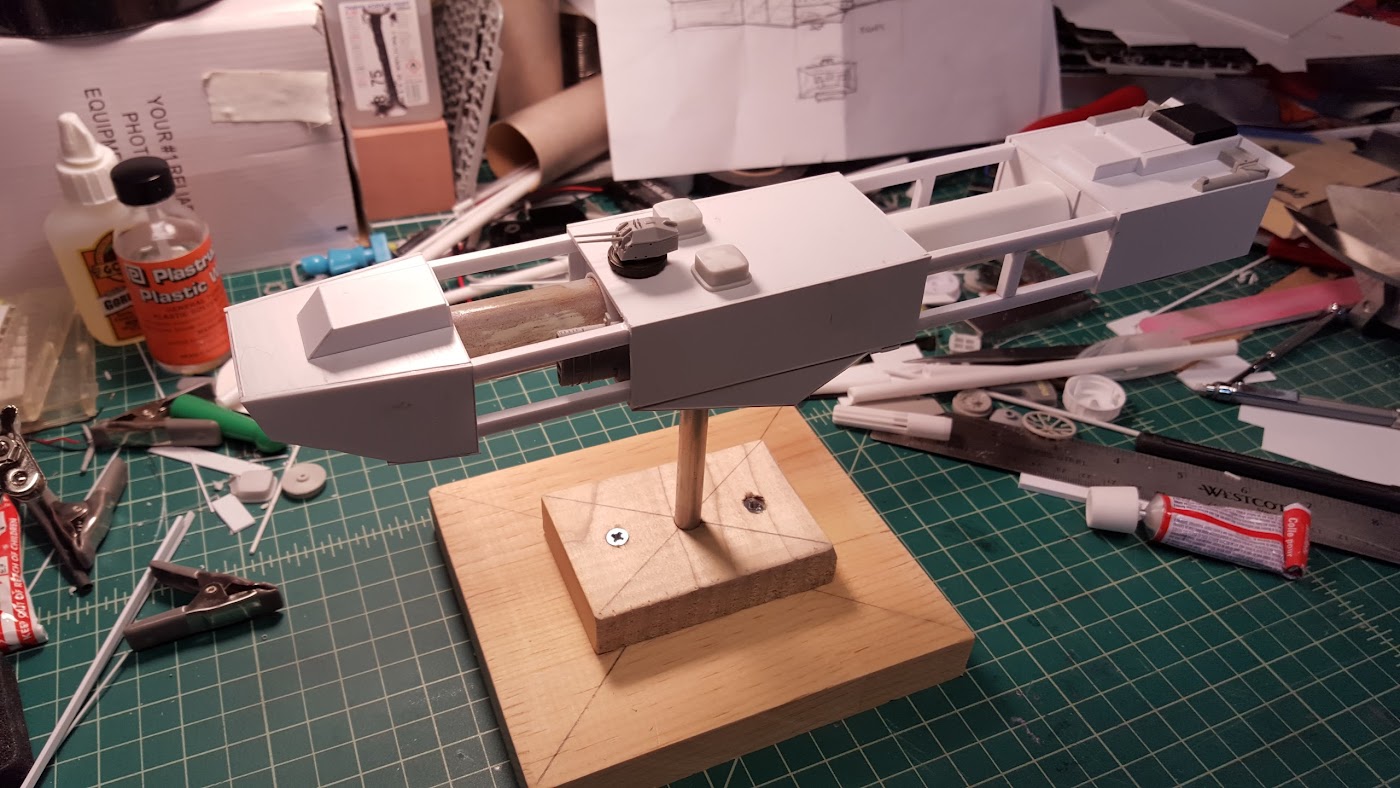
The model is basically a clean slate right now. I have to decide what parts will have more detail and what areas will just have panel scribes or raised panels on it. What guides this decision process are two primary things: the purpose of the starship and the age of the starship. If the ship is an old scrap heap, it will have more details exposed if it is old, it probably has undergone a lifetime of refits and structural changes to keep it space worthy.
In the case of this particular model, the SS Weippe is an old, corvette military ship. I happen to know that it’s over fifty years old and is used primarily for escorting shipping lanes to protect them from space pirates. Although it’s military they are not currently at war with anyone. So no battle damage is needed.

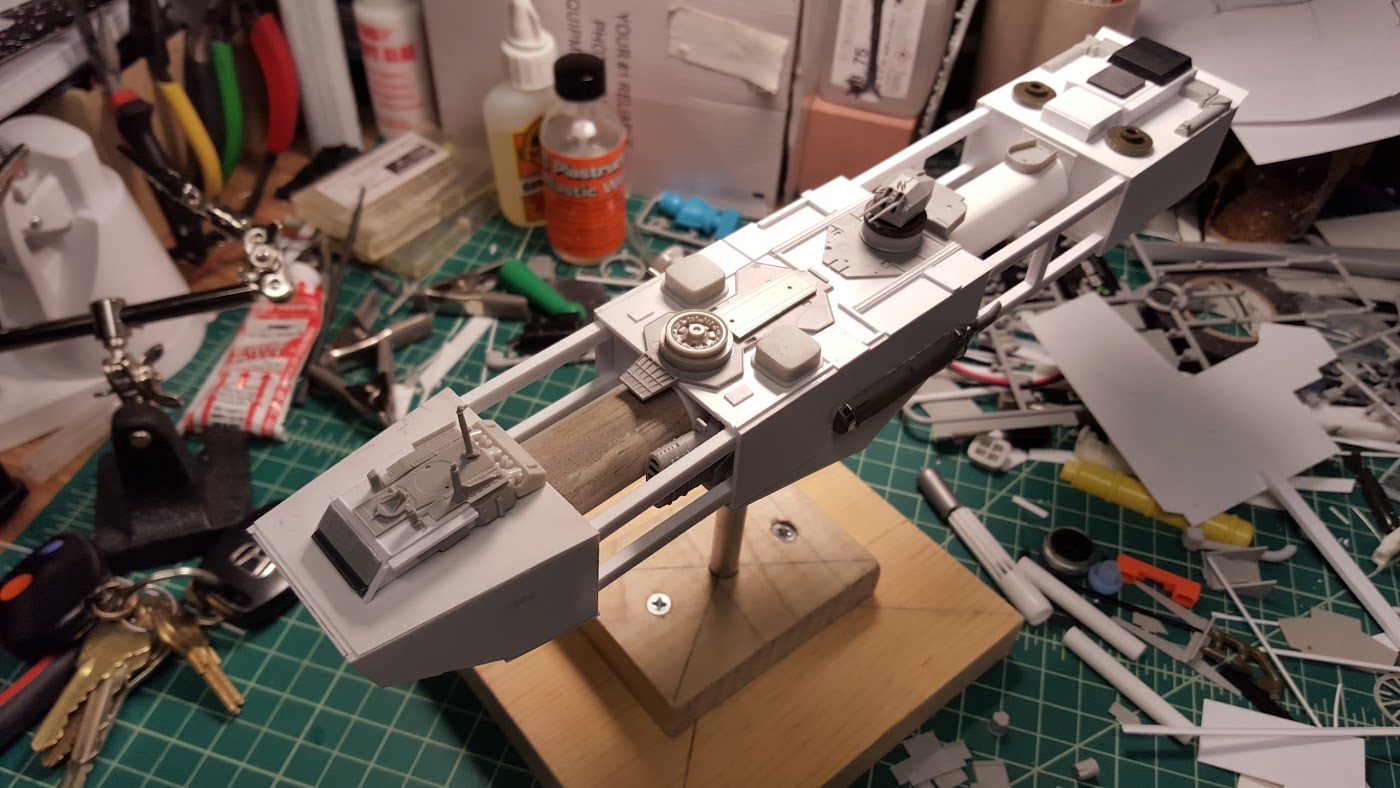
At this point I’ve refined the bridge area, the top deck including the cannon and the engine area. I’ve also used all three techniques! I’ll start with the bridge and work my way back, explaining how and why I did what I did.
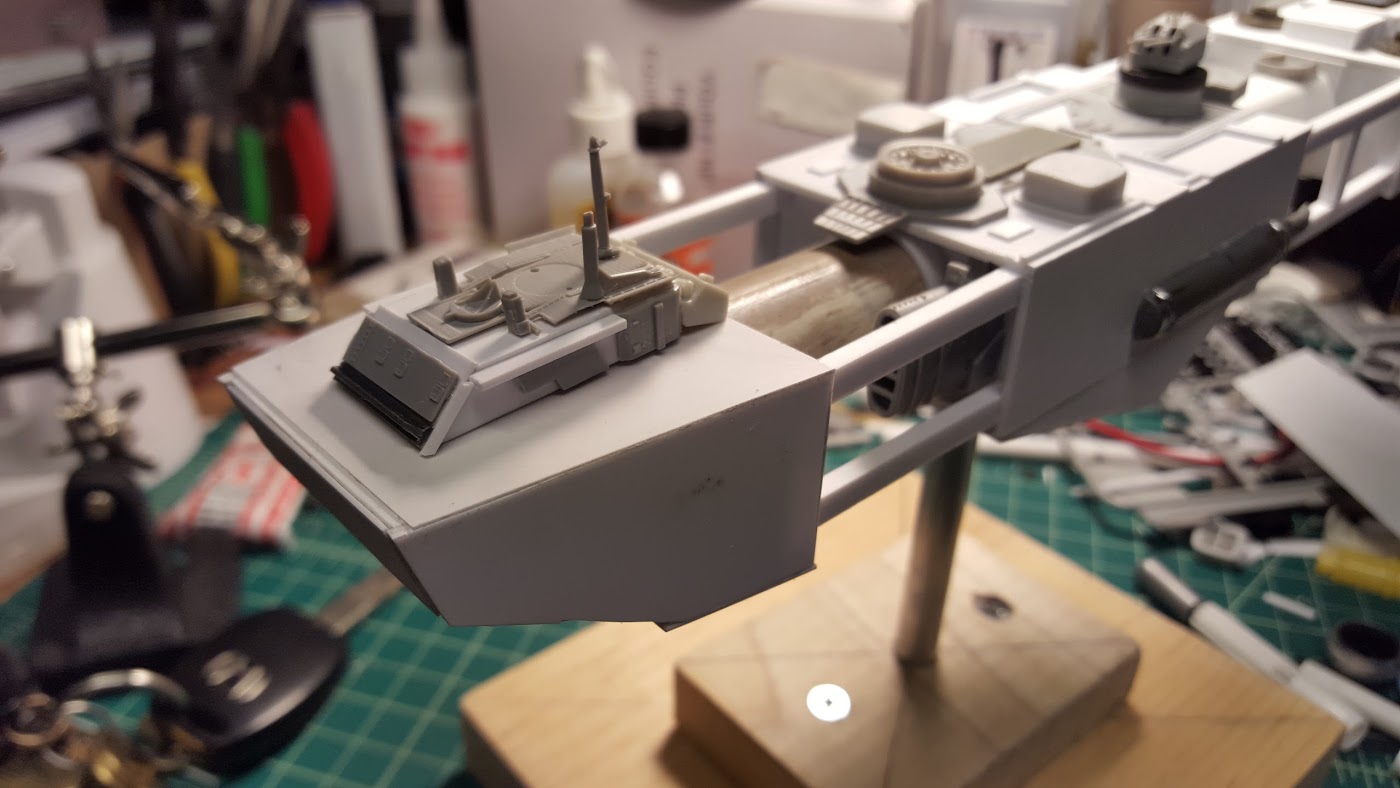
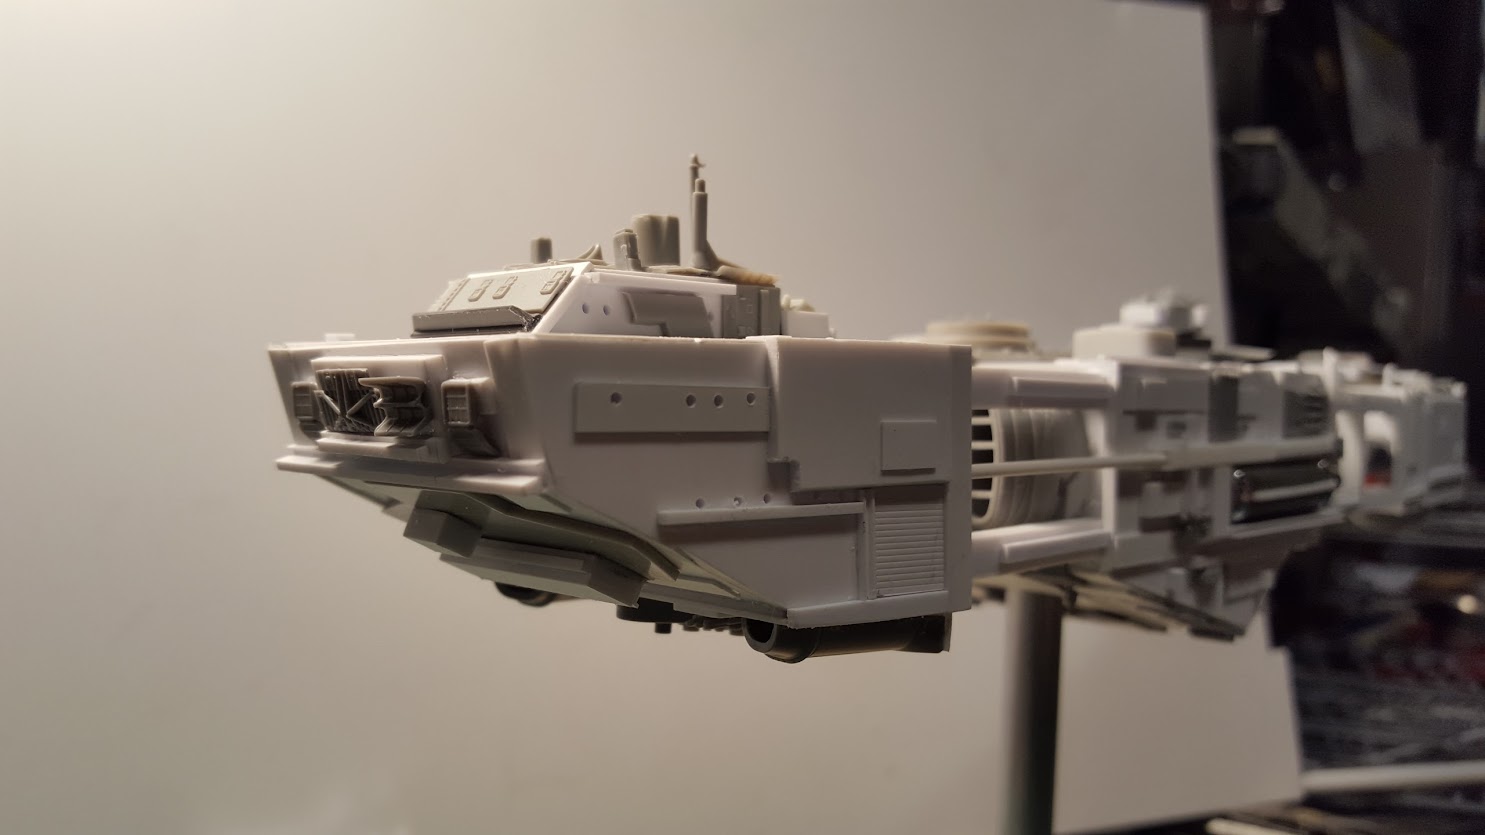
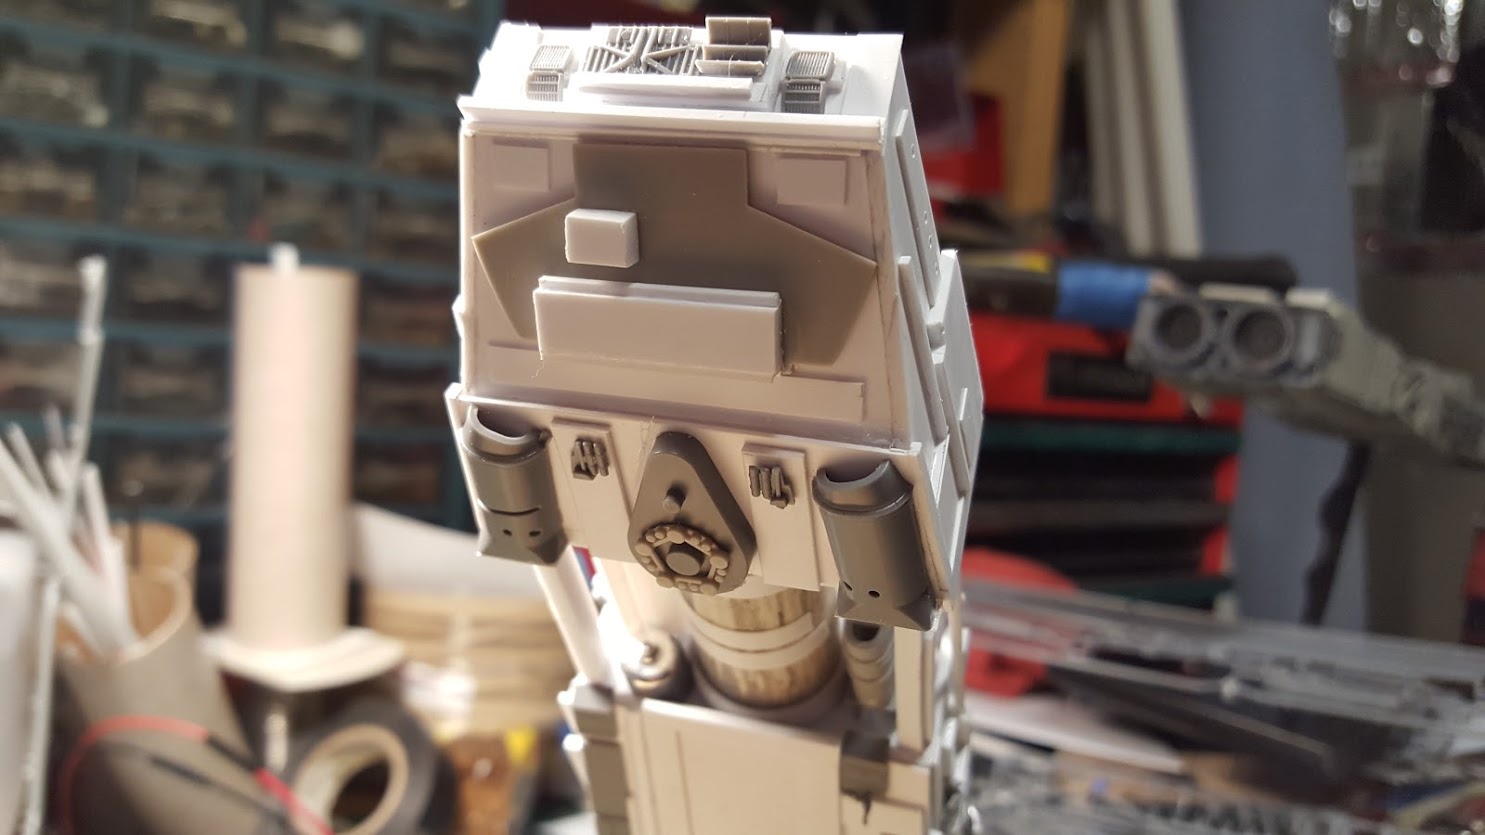
All I had was a blocked out shape from sheet styrene. For the bridge I was after a nautical look. This ship is featured in a novella called Corvette and its basically a naval story set in space. The ship is small, just like the WWII British Navy Flower class corvettes.
I used mostly naval parts from destroyer models. Because this is pre-war starship, I couldn’t use some of the design features found on ships at war. So there are no reactive armor blocks or anti-starfighter guns. But we do have a suggestion of comm antennas and other similar types of gear on top and to the back side. I used an engine cylinder head from a car model on the very back and detailed around it with strips of styrene.

Moving on to the top of the main body and I start to integrate model parts with strips of styrene and some raised panels. I have another circular piece ahead of the gun turret but I’m not sure what that exactly is. I just like the way it balances out the detail on the top. I also added fire control towers and some deck plates from the destroyer kit.
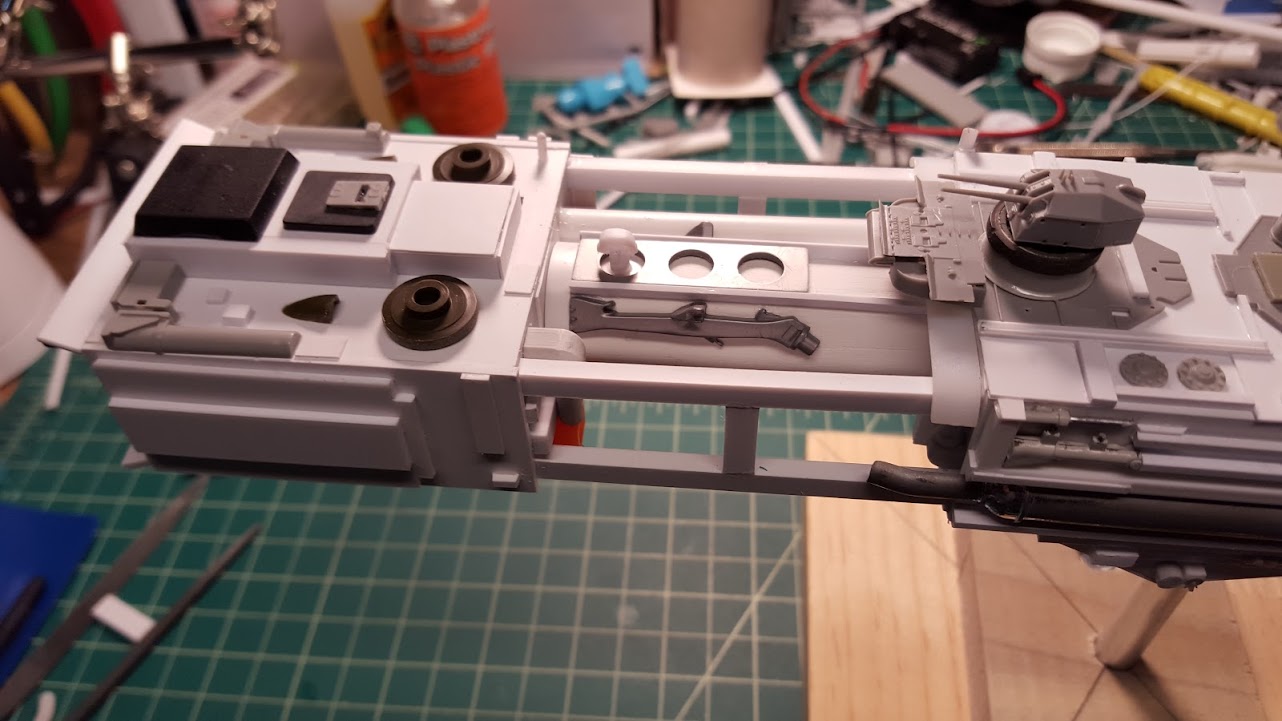
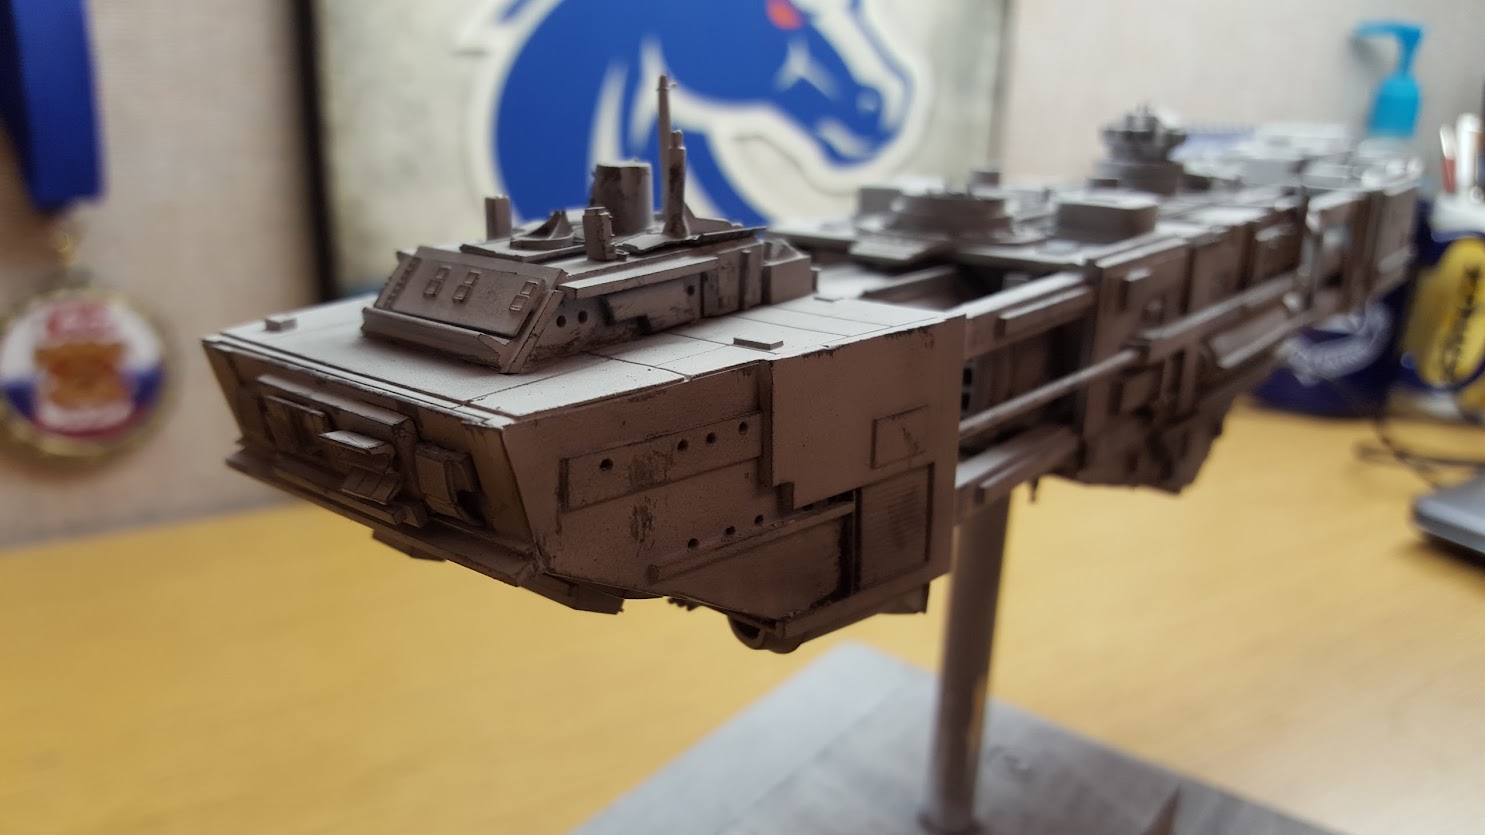
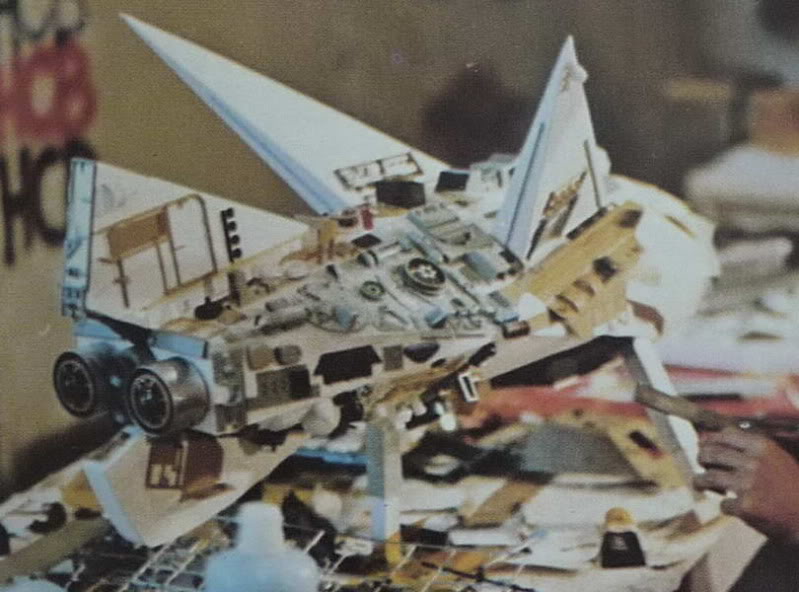
For the stern or engine area I was constrained to follow the detailing I have done on a slightly larger destroyer model. So I tried to mirror what that model did for the entire engine area. Whereas the destroyer had two star drives, this one only has a single drive. Below you can see the larger destroyer model built to the same scale. Not exactly the same, but similar enough to be related.
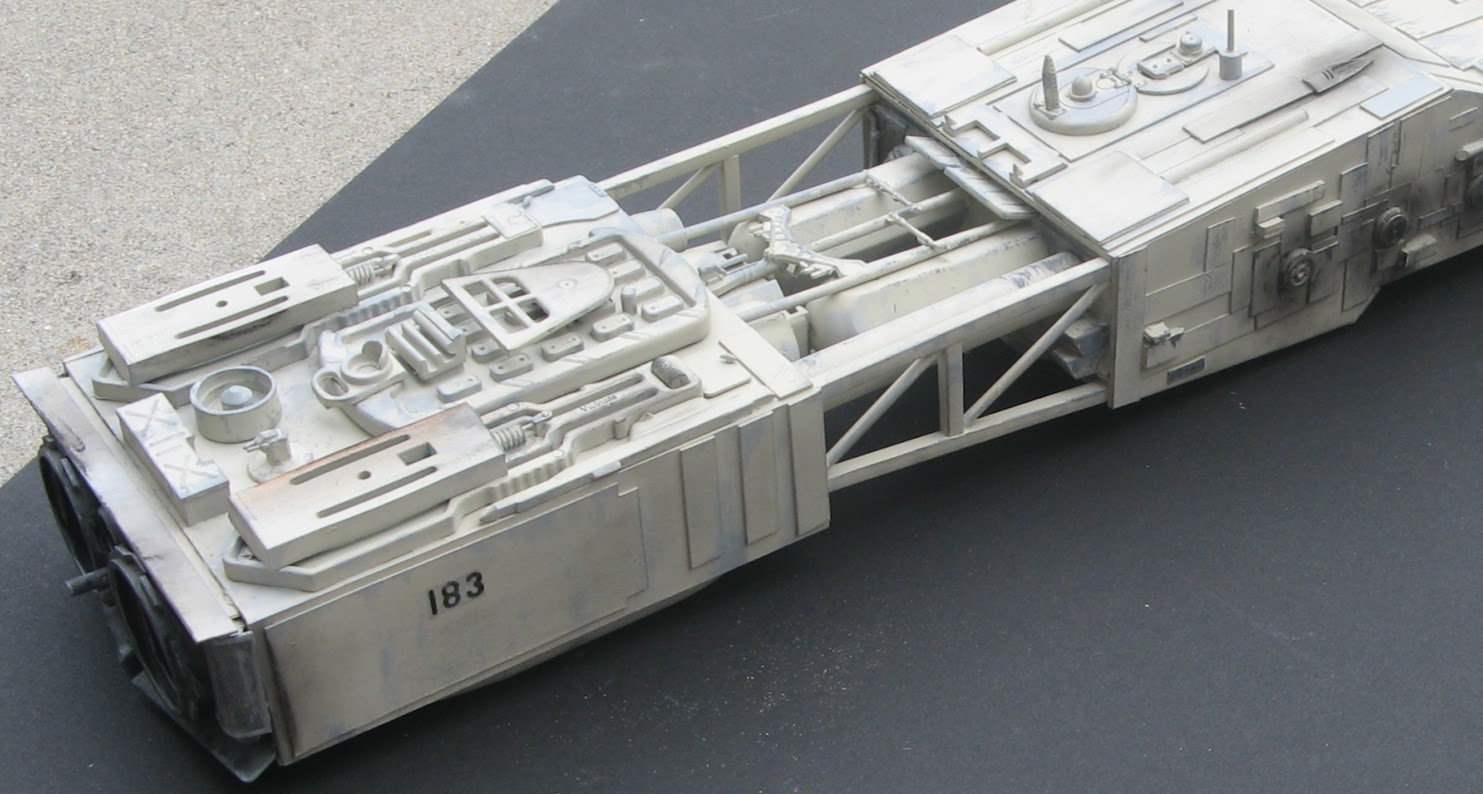
Next came the sides of the starship. I used mostly sheet styrene of various thicknesses and strips for this area. That’s a ship’s main smoke stack in there too. Sometimes you add pieces for eye interest. That was the case for the grilled piece on the bridge area. I drilled out the port holes, but won’t be installing Fiber Optics in this build. I think they help give you a sense of scale though. I also added some square tube and a round tube to the side. I tried to make it look like modifications to the base design have been made. Because this is an old starship.
Along the side of the body I used a big old car muffler that was chromed. Rather than bleaching off the chrome I just scraped it off so I could add details to it. Glue doesn’t stick too good to chrome. Car model builders can attest to that. I also used the destroyer’s torpedo tubes here. Most of the rest of it is layers of styrene shapes and plates. The grooved styrene strips of various sizes comes in handy here to suggest beams or girders. The one pipe that sticks up by the gun turret is kinda cool. No real purpose.

The back of the Weippe was kept pretty clean. I mostly just used sheets of styrene for raised panels. Eventually I’ll paint a registration number on there or use a decal. So I wanted it to be flat.
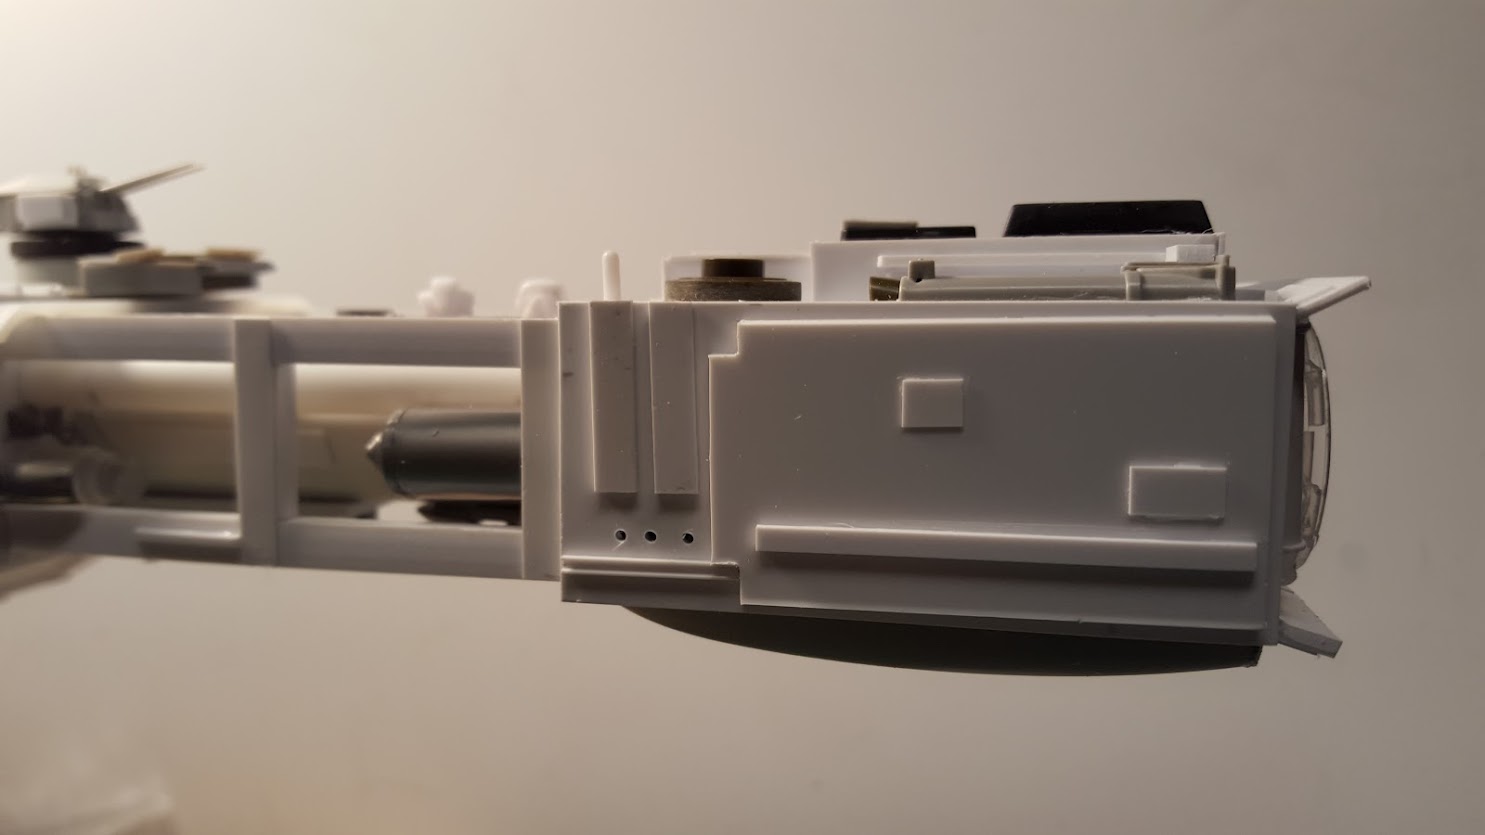
A brief stop at the nose to show off some scanners and such. I went extra heavy on the sheet styrene for some reason. I think I was just trying to add bulk because the Flower Class corvettes were kinda chubby boats. Some of the “scanners” were actually life boats from the destroyer kit.
Moving on to the bottom of the bridge area now. A few larger funnels were used to suggest mechanical complexity. Pretty boring though because I knew it wouldn’t be really seen much. Another great reason to use smaller boat model parts is that they are small and can easily suggest all kinds of industrial purposes.
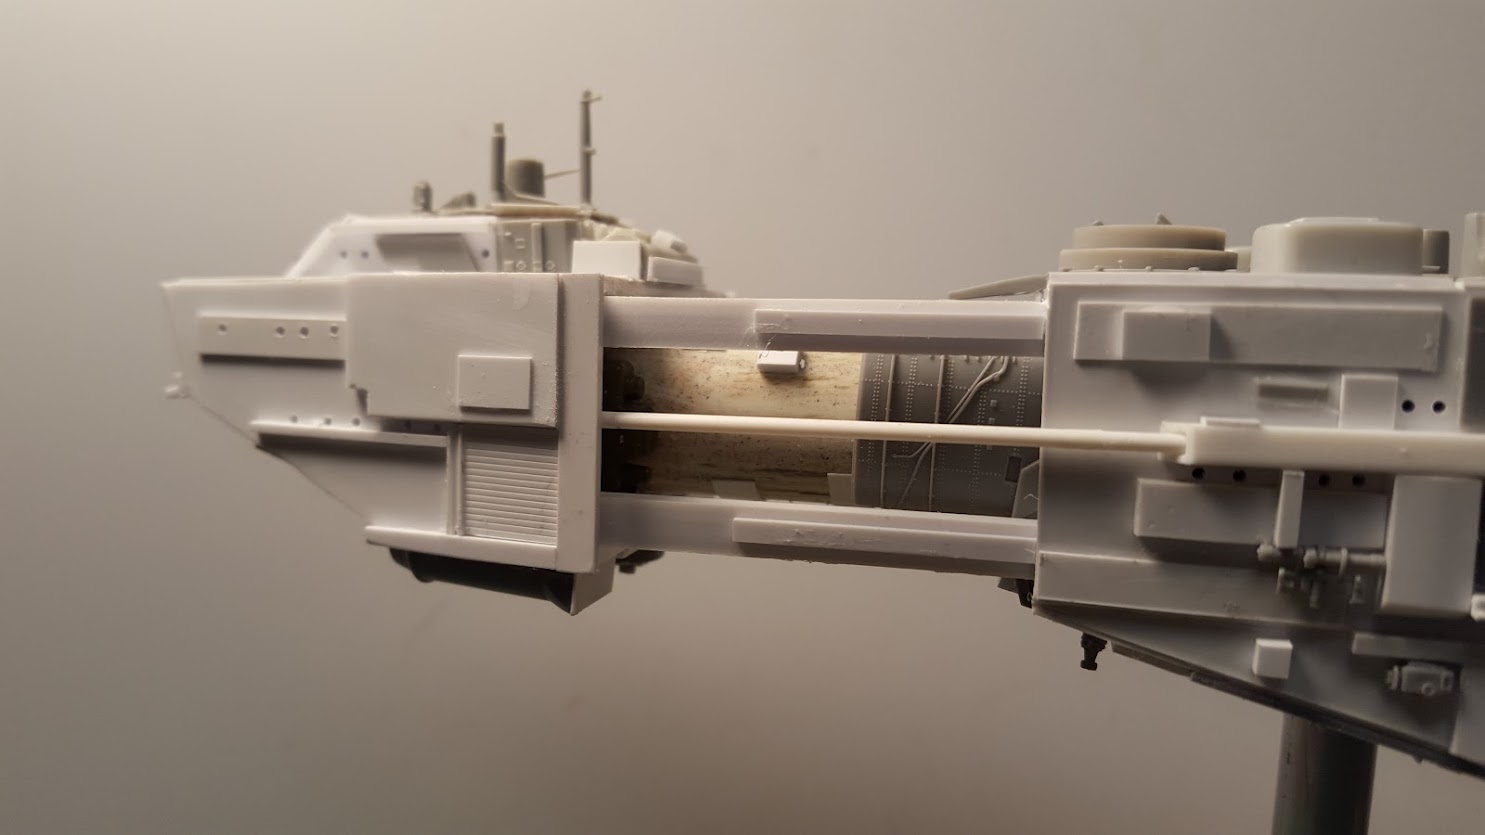
The bottom of the main hull has the mount pole going through it. So I had to devise a sliding section to cover it if I ever photographed the model from another mount point. Hiding mounts is fun and can determine to some extent what your detail looks like. Sometimes I have sneaky sliding parts and other times I have parts that can be removed to get access to the mount point. Details here are flat and mostly strips of plastic either boat parts or stock.

The back of the engine area is dominated by aircraft fuel tanks or travel pods. I had to follow the design logic of the destroyer model for that. Some larger kit parts under the tubes in the middle. Under the body is a bay door for a shuttle. I chose to keep it closed on this one as there is a solid block of RenShape inside there. The big chrome truck wheel is pretty obnoxious, but again, won’t be seen much.
An import step in detailing is to throw some primer on the whole model so you can see how things are looking without the distractions from all the weird colors. I usually spend some time just looking at it and seeing if there are areas that need more attention before proceeding to painting and weathering. Here’s what the model looks like with primer.

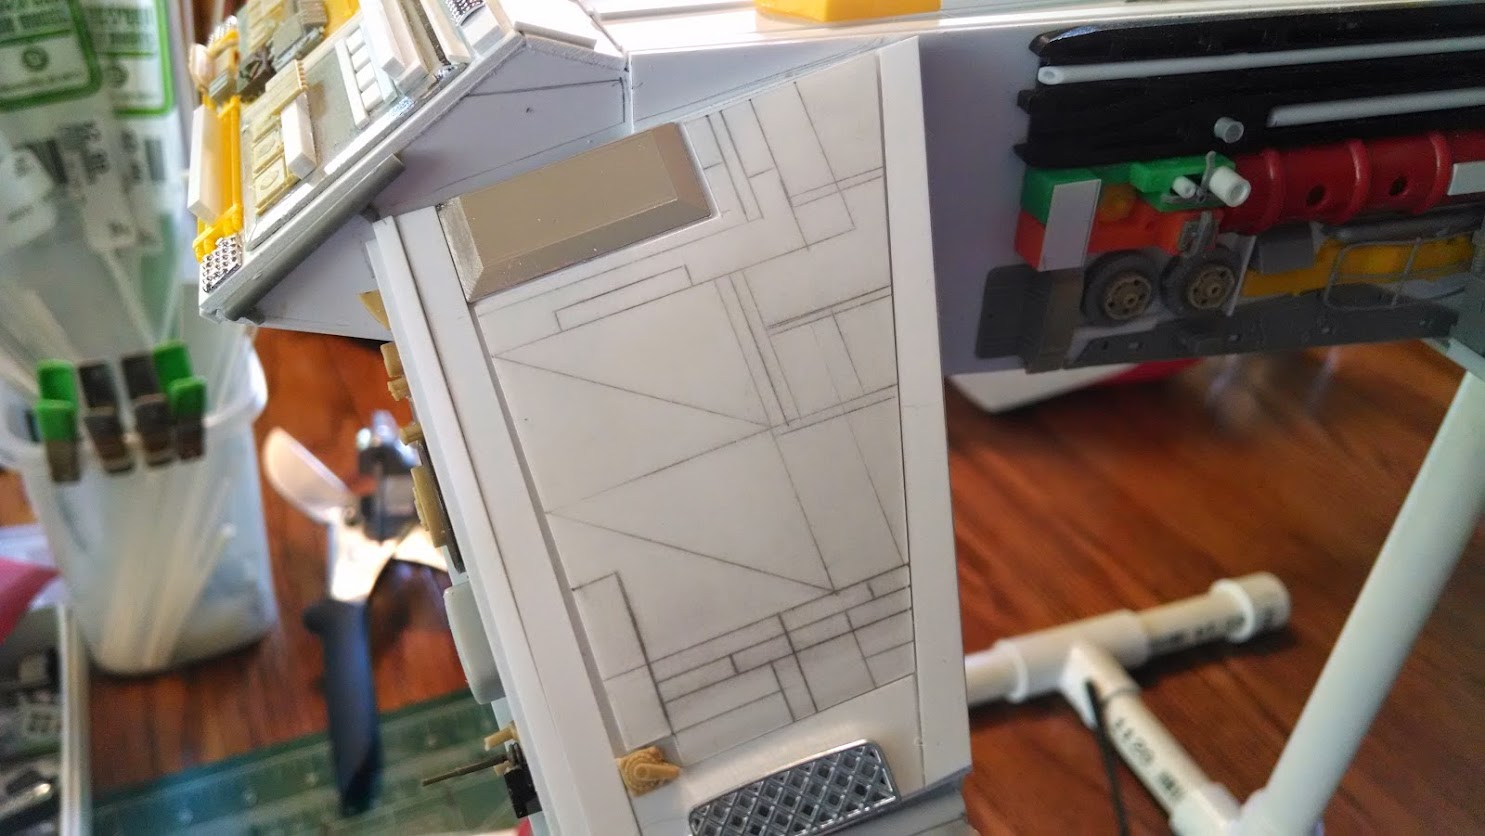
I want to circle back here at the end and talk a bit about scoring panel lines. The only place I did that on this model was on the top of the head or bridge area. I sued a Tamiya scribe for that and stupidly did it late in the build. Ideally you should plan to scribe your model before laying any complicated greeblies down.
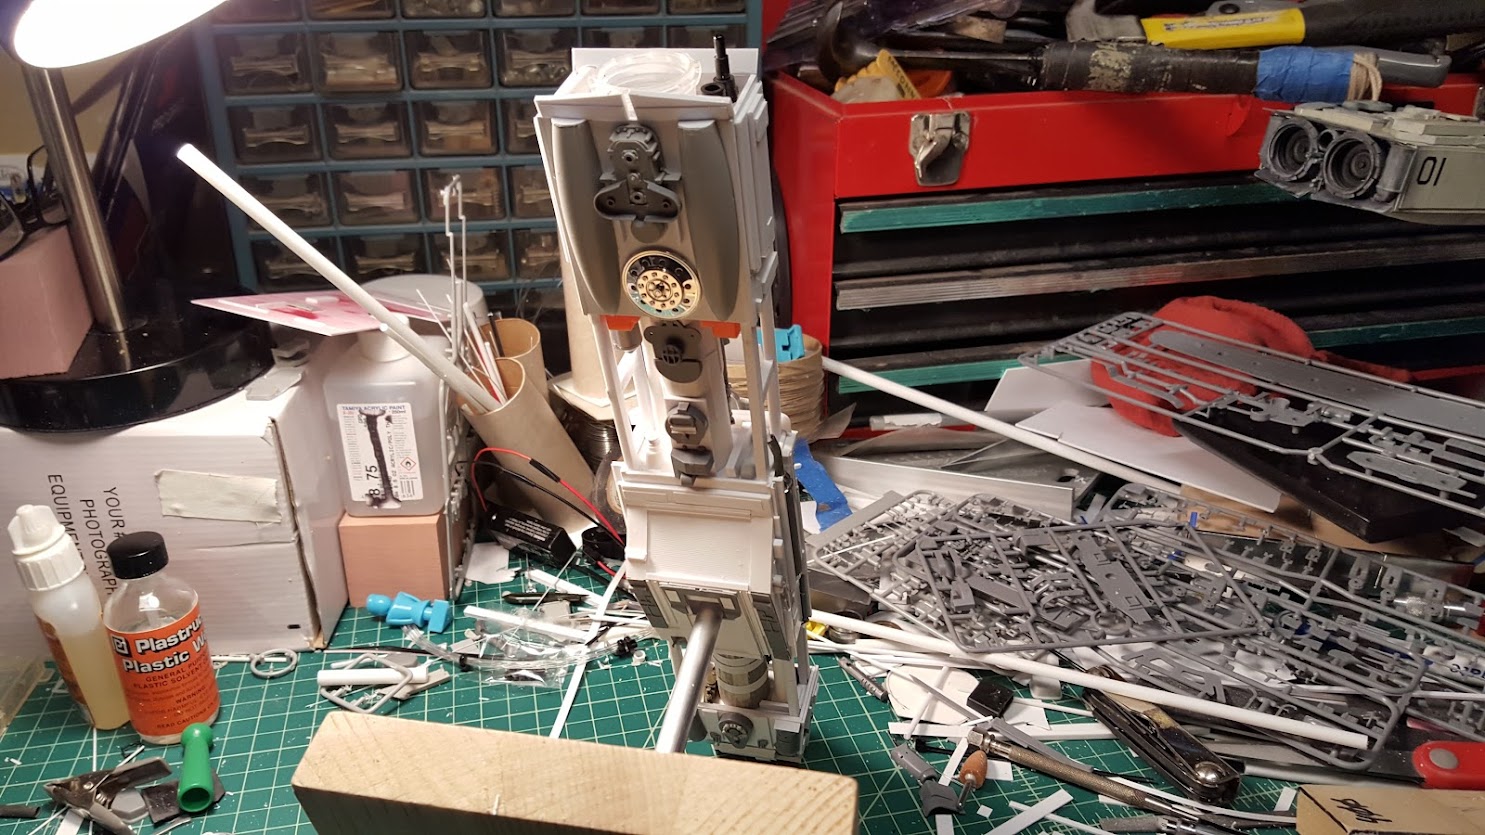
Sometimes you can get away with scoring panels before you even put a piece of styrene on the main model. Below you see the tools I used to do this on a Votainion warship model. The toothbrush is used to file off the raised areas and rub finger grease into the cracks so you can see the lines. I use a thin leaded mechanical pencil and a metal ruler to draw out the lines before scribing them. It’s important to use a metal ruler for this so you don’t cut the ruler and your lines stay straight.

Sticking with the warship model for a moment, I’d like to bring up the point that you don’t just have to use model kit parts for greeblies. Just about anything can be used. Below the bridge on this model is a cartridge of some kind, kid computer keys and a fan blade from a PC fan.
I did this crude parts call out to illustrate all the various things I used in this one part of the model.

Heck, I even used a light saber on the bottom!

The biggest takeaway from all this is to have fun and be creative. Don’t just slap parts on willy nilly or you’re going to have yourself a mess, like the models from Star Crash! Where they left model parts on the trees and just glued them to the side of the model. No form follows function or any of that nonsense.
Or you could look like the models I made as a kid!


French Translation can be found here: http://www.cyber-mecha.com/blog/tuto-le-detaillage-des-montages-en-scratch-1ere-partie-par-ken-mc-connell/