Finished!

This build took me about six months total to complete. Not all of that time was sequential. There were some start and stop periods, but once I decided to stay on task, most of it was done in the last two months.
I don’t know how much money I spent on it, but a good guess would be in the two hundred dollar ball park. Building models is a hobby, so one does not expect to make money from doing it. You do it because it gives you pleasure and you hope others enjoy it too. Kind of like my novel writing hobby. Except at least occasionally, someone buys a book and I get back a few dollars.
This is the second of three versions of an Alliance starship from my Star Series novels. The first was the SS Sokol from the novel Starforgers. The SS Sokol was one of the first warships used in the Great War. The GCU Sokol was built some five hundred years into the war and was much bigger and more powerful. It is similar to starships described in the Starstrikers novel. The final build will be the GA Sokol and it will be one of the first post-war starships of the Grand Alliance, from the Starveyors time period.
The goal of building these models was to show starship evolution in my SF book series.
When the final model is built, I will display them next to each other and viewers can then marvel at how starship design changed over the millennium of the Great War.
You can read about my SS Sokol build here.
The GCU Sokol model is only my second large, plastic, scratch-build model. The SS Sokol being my first. They are the same scale – approximately 1/500. There are no lights in them and no mounting system. They were intended to be display models only. The final model in the series will have both mount points and lights, as I attempt to expand on my skills and make a more useful model for photo shoots.
Lessons learned on the GCU Sokol build:
1. Don’t use heavy PVC pipes for your engines. Too awkward to work on something that can’t be mounted.
2. Decide on the base color before painting. I painted the whole thing in a custom color that the local hobby shop then ran out of. Because it looked better in car primer gray, I completely repainted it.
3. You need kit bashing parts from tanks and or other war models to do the sort of details that I wanted to do. Dollar store plastic greeblies only go so far. However, they can provide you with some memorable parts.
4. Modeler tools can make your life easier: saws, miter boxes and cutting mats are indispensable So are variable speed grinders and work bench vises.
5. My model parts boxes are empty. I cannot build the next model without some donations of old, un-built kits. It may take me a while to locate more useful model kits. Buying them outright is impossible at today’s kit prices.
Final Steps
Here are some final pictures of the finished model. Weathering was accomplished mostly by dry brushing with artist pastels. Chiefly black and gray and some brown. I used black paint in a wet brush technique in some locations. I also used some aluminum paint here and there and some darker and lighter grays for contrasting panels.
The windows are cut strips of reflective tape. This made them rectangular instead of round. I’ll be going back to round in the next model, due to the shape of the fiber optics I’ll be using for lighting.
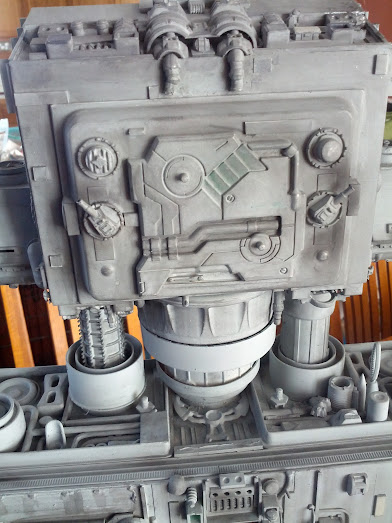
This is the underside of the head of the starship.

Looking further down the bottom at the keel. There are some small blast holes near the cannons.
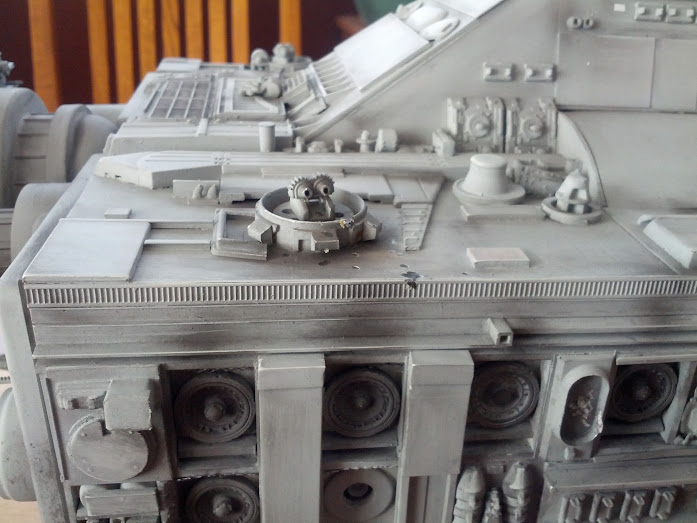
This is a cannon on the top of the main gun deck. The tiny blast holes were made with my hobby grinder.

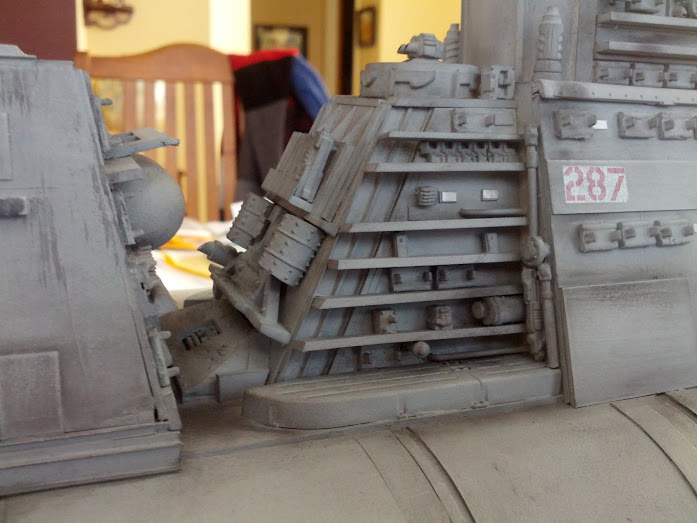
This is the neck and head from the side. More hits on the canon area. I figure this is where the enemy fighters were trying to knock out the guns.
This is the terrace area behind the main decks. The decal sheen is horrible. I should use dry rub decals in the future.

This is a close up of the new armor being installed on the stardrive tubes.
Had fun doing that little detail.

There she is, flying alongside the enemy Interceptor, also from Starstrikers.
For a complete album of the pictures I took of this build, please see this Google Plus album.

